高火力 VRTで作る映像生成AI環境(Wan2.2&GradioによるText to Video)

こんにちは、にしだゆうきです。
昨年、OpenAIが2025年9月に次世代の動画生成AIモデルとして「Sora 2」を発表しました。
これによってさらに映像コンテンツの制作やアイデア捻出が簡単になってきたと注目が集まっています。
今回は、こうしたText to Video(文章からの映像生成)を行うAIとしてAlibaba Cloudが開発提供するオープンソースの動画生成AIモデル「Wan2.2」を弊社が提供するシンプルなGPUクラウドサービスである「高火力 VRT」上にデプロイする方法をご紹介します。さらに、WebUI上でプロンプトを元に動画を作成してくれるアプリケーションを作成するまでの手順も併せて解説します。
最後にOSイメージをご紹介しています。これを利用することで特別な設定をおこなわずに、すぐにアプリケーションを使い始めることもできます。ただし、本記事ではエンジニア観点で必要な作業がイメージできるよう、なるべくわかりやすくOS上での構築手順を紹介します。
構築するもの
今回はGPUを搭載した単一サーバー(VM)上に下記の環境を構築し、シンプルなプロンプトから映像を生成できる環境を実現します。
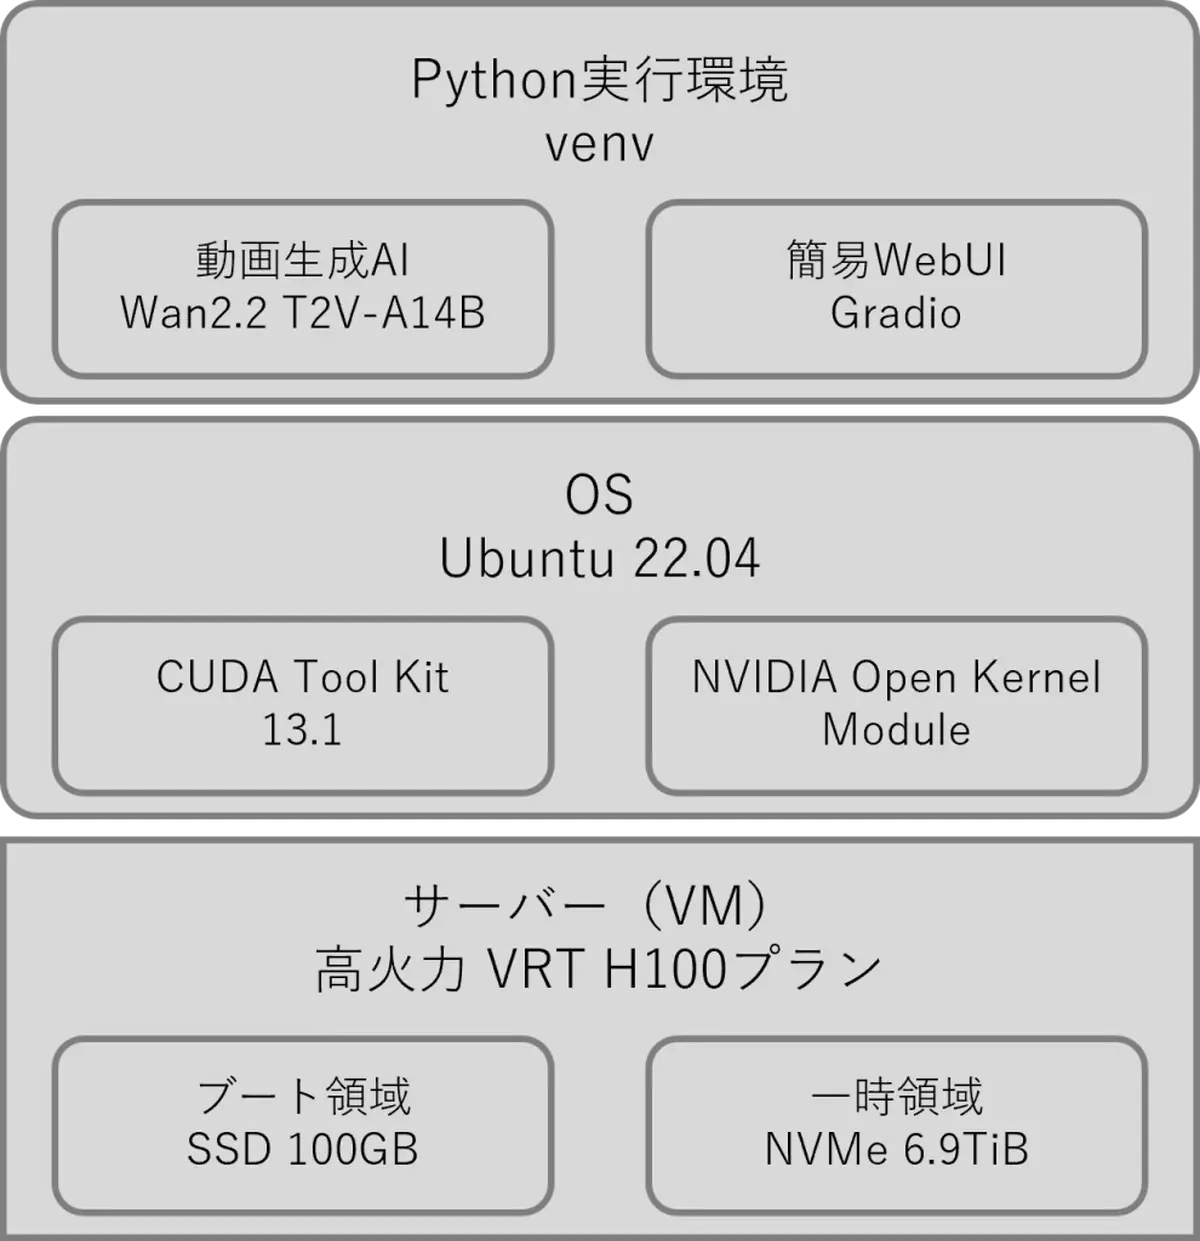
- サーバー:高火力 VRT H100 プラン(6.9TiBのNVMe一時領域を含む)
- ディスク:SSD 100GB(OSブート領域として)
- OS:Ubuntu 22.04
- Python実行環境:venv(環境名:text2video)
- モデル:Wan2.2 T2V-A14B(Text to Video用の映像生成モデル)
- WebUI:Gradio(Pythonで作成したインタラクティブなWebアプリケーションを公開できるライブラリ)
制約や条件
本記事では高火力 VRTの仕様やわかりやすさを考慮して、以下の制約や条件を設けます。
- ストレージの処理性能およびコストを抑えることを優先する
- 高火力 VRTに付随して提供される一時領域(NVMe)を活用します。そのため、サーバーの停止(シャットダウンだけでなくハングアップやホスト障害などを含む)によって一時領域はクリアされ、再起動した際には同様の構築作業が必要となります。
- セキュリティ設定は割愛する
- 本内容で構築されたサーバーはインターネット側への到達性を持ちますが、一般的なWeb公開におけるセキュリティ設定を含みません。継続的な公開は不正アクセスなどのリスクがあるため、利用しない際には停止することを推奨します。
- ターミナルソフトウェアからの操作を想定する
- コントロールパネルのコンソール機能でも同様の作業は可能ですが、応答速度などの利用体験も考慮し、一般的に利用するであろうTeratermを始めとするターミナルソフトウェアでの手順を示します。
- sudoコマンドを実行時にはパスワード入力を求められる場合がある
- 利用するUbuntuOSはログイン時間等により、適宜sudoコマンド実行時にパスワード入力を求められる場合があります。本ページではこれらの入力表示は適宜割愛して記載します。
- 自動化は行わず、手作業での構築手順を示す
- 一部さくらのクラウドではスタートアップスクリプトやcloud-init、OSイメージのアーカイブ化やOSによる自動実行(/etc/rc.local)などによる簡素化も可能ですが、全体的に必要な作業を理解できるよう、コマンドライン実行での手順を解説します。
実行コマンドまとめ
本記事で必要となる実行コマンドを以下にまとめます。
なお、設定に直接関係しない確認関連のコマンドは省略しています。
サーバー起動直後からvenv起動まで
# NVMe一時ディスクをext4でフォーマット(全データ消去)

sudo mkfs.ext4 /dev/nvme0n1

# モデル格納用ディレクトリを作成

sudo mkdir -p /models

# NVMeディスクを/modelsにマウント

sudo mount /dev/nvme0n1 /models

# CUDAリポジトリのAPT優先度設定ファイルを取得

wget https://developer.download.nvidia.com/compute/cuda/repos/ubuntu2204/x86_64/cuda-ubuntu2204.pin

# CUDAリポジトリの優先度を設定(APT pinning)

sudo mv cuda-ubuntu2204.pin /etc/apt/preferences.d/cuda-repository-pin-600

# CUDA 13.1 ローカルインストーラ(.deb)をダウンロード

wget https://developer.download.nvidia.com/compute/cuda/13.1.1/local_installers/cuda-repo-ubuntu2204-13-1-local_13.1.1-590.48.01-1_amd64.deb

# CUDAローカルリポジトリパッケージをインストール

sudo dpkg -i cuda-repo-ubuntu2204-13-1-local_13.1.1-590.48.01-1_amd64.deb

# CUDAリポジトリのGPGキーをAPTキーストアへ配置

sudo cp /var/cuda-repo-ubuntu2204-13-1-local/cuda-*-keyring.gpg /usr/share/keyrings/

# パッケージリストの更新

sudo apt-get update

# CUDA Toolkit 13.1をインストール

sudo apt-get -y install cuda-toolkit-13-1

# NVIDIA Open GPUカーネルモジュールをインストール

sudo apt-get -y install nvidia-open

# 開発・実行に必要な基本パッケージをインストール

sudo apt-get -y install git python3-venv python3-dev build-essential ffmpeg libgl1

# Wan2.2用ディレクトリを作成して移動

sudo mkdir -p /models/Wan2.2 && cd /models/Wan2.2

# Python仮想環境「text2video」を作成

python3 -m venv text2video

# models配下の所有権を現在ユーザーに変更(pip実行対策)

sudo chown -R $USER:$USER /models

# 仮想環境を有効化

source text2video/bin/activate
venv起動直後からモデルのダウンロードまで
# /models ディレクトリの権限変更
sudo chown -R $USER:$USER /models

# pipを最新バージョンへ更新
pip install -U pip

# CUDA 12.1対応のPyTorch関連パッケージをインストール
pip install torch==2.5.1 torchvision==0.20.1 torchaudio==2.5.1 --index-url https://download.pytorch.org/whl/cu121

# Hugging FaceおよびGradioなどの周辺ライブラリをインストール
pip install -U ftfy sentencepiece imageio imageio-ffmpeg

# 生成AI実行関連のソフトウェアインストール(要バージョン固定)
pip install "diffusers==0.36.0" "transformers==4.57.6" "accelerate==1.12.0" "huggingface-hub==0.36.2" "gradio==5.50.0"

# SSH公開鍵(ed25519)を生成(Hugging FaceやGit連携用)
ssh-keygen -t ed25519 -C "your.email@example.co"

# 作成した公開鍵を出力
cat /home/ubuntu/.ssh/id_ed25519.pub

# Hugging FaceからWan2.2 T2V-A14Bモデルをローカルへスナップショット取得
python -c "from huggingface_hub import snapshot_download; snapshot_download(repo_id='Wan-AI/Wan2.2-T2V-A14B-Diffusers', repo_type='model', local_dir='./Wan2.2-T2V-A14B-Diffusers', local_dir_use_symlinks=False, resume_download=True); print('model snapshot done')"
vim run.pyの記述内容
import argparse, os, torch, numpy as np, imageio
from PIL import Image
from diffusers import DiffusionPipeline
from diffusers.utils import numpy_to_pil

# 断片化対策(任意だが推奨)

os.environ.setdefault("PYTORCH_CUDA_ALLOC_CONF", "expandable_segments:True")

parser = argparse.ArgumentParser()
parser.add_argument("--model_path", type=str, required=True)
parser.add_argument("--prompt", type=str, required=True)
parser.add_argument("--output", type=str, default="output.mp4")
parser.add_argument("--num_frames", type=int, default=97)    # (N-1)%4==0 推奨域
parser.add_argument("--dtype", choices=["fp16","bf16"], default="bf16")
parser.add_argument("--fps", type=int, default=24)
parser.add_argument("--guidance_scale", type=float, default=6.5)
parser.add_argument("--steps", type=int, default=50)
parser.add_argument("--seed", type=int, default=0)

args = parser.parse_args()
assert os.path.isdir(args.model_path), f"model_path not found: {args.model_path}"
torch.backends.cuda.matmul.allow_tf32 = True
dtype = torch.bfloat16 if args.dtype == "bf16" else torch.float16

# (N-1)%4==0 補正

if (args.num_frames - 1) % 4 != 0:
    down = args.num_frames - ((args.num_frames - 1) % 4)
    up   = down + 4
    args.num_frames = min([down, up], key=lambda x: abs(x - args.num_frames))
    print(f"[info] adjusted num_frames to {args.num_frames}")

# 1) パイプライン読み込み:torch_dtype を明示

pipe = DiffusionPipeline.from_pretrained(args.model_path, torch_dtype=dtype)

# 2) xFormers を明示的に無効化

try:
    pipe.disable_xformers_memory_efficient_attention()
    print("[info] xFormers disabled.")

except Exception:
    pass

# 3) SDPA を有効化(失敗しても動くようにガード)

sdpa_ok = False

try:
    pipe.enable_sdpa()
    sdpa_ok = True
    print("[info] SDPA enabled.")

except Exception as e:
    print(f"[warn] enable_sdpa failed: {e}")

# 4) 段階的 CPU オフロード(ピークVRAM抑制)

pipe.enable_sequential_cpu_offload()

# 5) VAE 最適化

pipe.vae.enable_tiling()
pipe.vae.enable_slicing()
pipe.vae.to(dtype=torch.float16)

# 6) 乱数は CUDA(latents を GPU 生成)+ sdpa backend のログ

g = torch.Generator(device="cuda")

if args.seed and args.seed > 0:
    g.manual_seed(args.seed)

print(f"[info] dtype={dtype}, sdpa={sdpa_ok}")

with torch.autocast("cuda", dtype=dtype):
    result = pipe(
        prompt=args.prompt,
        num_frames=args.num_frames,
        guidance_scale=args.guidance_scale,
        num_inference_steps=args.steps,
        generator=g,
    )

raw_frames = result.frames

# --- 多枚化も含めた RGB 正規化 ---

from typing import List

def normalize_to_rgb_list(item) -> List[Image.Image]:
    imgs = []

    if isinstance(item, Image.Image):
        return [item if item.mode == "RGB" else item.convert("RGB")]

    if isinstance(item, torch.Tensor):
        arr = item.detach().cpu().float().numpy()

    else:
        arr = np.asarray(item)

    if arr.ndim == 4:  # (T,H,W,C)
        for sub in arr:
            pil_list = numpy_to_pil(sub)
            seq = pil_list if isinstance(pil_list, list) else [pil_list]
            for im in seq:
                imgs.append(im if im.mode == "RGB" else im.convert("RGB"))

    else:
        pil_list = numpy_to_pil(arr)
        seq = pil_list if isinstance(pil_list, list) else [pil_list]
        for im in seq:
            imgs.append(im if im.mode == "RGB" else im.convert("RGB"))

    return imgs

frames_rgb = []

for it in raw_frames:
    frames_rgb.extend(normalize_to_rgb_list(it))

# --- CFR でエクスポート(互換性&秒数を揃える) ---

writer = imageio.get_writer(
    args.output,
    fps=args.fps,
    codec="libx264",
    format="ffmpeg",
    ffmpeg_params=["-pix_fmt", "yuv420p", "-vsync", "cfr"],
    macro_block_size=None,
)

try:
    for img in frames_rgb:
        writer.append_data(np.array(img))

finally:
    writer.close()

print("Saved:", args.output)
print(f"[debug] frames={len(frames_rgb)} fps={args.fps} expected_sec={len(frames_rgb)/args.fps:.3f}")
vim app.pyの記述内容
import os, time, random, threading, traceback, json, uuid, logging
from logging.handlers import RotatingFileHandler
from typing import List
import numpy as np
import torch, gradio as gr, imageio
from PIL import Image
from diffusers import DiffusionPipeline
from diffusers.utils import numpy_to_pil

# ------------------------------------------------------------

# 断片化対策(任意だが推奨)

os.environ.setdefault("PYTORCH_CUDA_ALLOC_CONF", "expandable_segments:True")

# ロギング設定(標準出力 + ローテーションファイル)

LOG_DIR = os.path.join(os.getcwd(), "logs")
os.makedirs(LOG_DIR, exist_ok=True)
LOG_PATH = os.path.join(LOG_DIR, "app.log")
logger = logging.getLogger("wan2v.app")
logger.setLevel(logging.INFO)
if not logger.handlers:
    fmt = logging.Formatter(
        fmt="%(asctime)s %(levelname)s [%(name)s] %(message)s",
        datefmt="%Y-%m-%d %H:%M:%S",
    )
    sh = logging.StreamHandler()
    sh.setFormatter(fmt)
    logger.addHandler(sh)
    fh = RotatingFileHandler(LOG_PATH, maxBytes=10 * 1024 * 1024, backupCount=5)
    fh.setFormatter(fmt)
    logger.addHandler(fh)
logger.info("==== Wan2.2 T2V-A14B Gradio server starting ====")

# ------------------------------------------------------------

MODEL_DIR = "/models/Wan2.2/Wan2.2-T2V-A14B-Diffusers"

# H100/近代GPU向け

torch.backends.cuda.matmul.allow_tf32 = True

# ロード dtype 既定(H100は bf16 推奨)

LOAD_DTYPE = torch.bfloat16

# ---- Pipeline 準備 ----------------------------------------------------------
# 注意:offloadを使うため、ここでは .to("cuda") は行わない

PIPE = DiffusionPipeline.from_pretrained(MODEL_DIR, torch_dtype=LOAD_DTYPE)

# xFormers を明示的に無効化

try:
    PIPE.disable_xformers_memory_efficient_attention()
    logger.info("[info] xFormers disabled.")

except Exception:
    pass

# SDPA を試行(未実装環境もあるため例外は握りつぶして警告)

sdpa_ok = False
try:
    PIPE.enable_sdpa()
    sdpa_ok = True
    logger.info("[info] SDPA enabled.")

except Exception as e:
    logger.warning(f"[warn] enable_sdpa failed: {e}")

# 段階的CPUオフロード(ピークVRAM削減)

PIPE.enable_sequential_cpu_offload()   # or: PIPE.enable_model_cpu_offload()

# VAE 最適化:タイル/スライス + VAEだけ fp16

PIPE.vae.enable_tiling()
PIPE.vae.enable_slicing()
PIPE.vae.to(dtype=torch.float16)
LOCK = threading.Lock()

# ---- Utility ---------------------------------------------------------------

def adjust_frames(n: int) -> int:
    """(N-1)%4==0 に最寄りで丸める(Wan系列の推奨制約)"""
    if (n - 1) % 4 == 0:
        return n
    down = n - ((n - 1) % 4)
    up = down + 4
    return min([down, up], key=lambda x: abs(x - n))

def normalize_to_rgb_list(item) -> List[Image.Image]:
    """
    任意の item (PIL / np.ndarray / torch.Tensor / それらのNバッチ) を
    3ch(RGB) の PIL.Image(uint8) のリストに正規化して返す。
    - 先頭のバッチ次元はすべて展開(=フラット)
    - CHW っぽい並びの場合は HWC に転置
    - 最終的に必ず RGB に統一
    """
    imgs: List[Image.Image] = []

    # すでに PIL

    if isinstance(item, Image.Image):
        return [item if item.mode == "RGB" else item.convert("RGB")]

    # Tensor → numpy、その他は numpy 化

    if isinstance(item, torch.Tensor):
        arr = item.detach().cpu().float().numpy()

    else:
        arr = np.asarray(item)

    # 先頭のバッチ次元をすべてフラット化(…×H×W×C に揃える)

    if arr.ndim >= 4:
        H, W, C = arr.shape[-3], arr.shape[-2], arr.shape[-1]
        arr = arr.reshape(-1, H, W, C)
        chunks = [arr[i] for i in range(arr.shape[0])]

    else:
        chunks = [arr]

    # 各チャンクを PIL に変換

    for a in chunks:

        # CHW(=3,H,W) など、チャネルが先頭に居るパターンを HWC に補正

        if a.ndim == 3 and a.shape[-1] not in (1, 3, 4) and a.shape[0] in (1, 3, 4):
            a = np.transpose(a, (1, 2, 0))  # (H,W,C) 化

        # 2次元(=Gray)でも OK(あとで RGB に変換)

        pil_list = numpy_to_pil(a)
        seq = pil_list if isinstance(pil_list, list) else [pil_list]
        for im in seq:
            imgs.append(im if im.mode == "RGB" else im.convert("RGB"))

    return imgs

def gpu_mem_info():

    """(free, total, used) を MiB で返す簡易メトリクス"""

    if not torch.cuda.is_available():
        return None
    free, total = torch.cuda.mem_get_info()
    used = total - free
    mib = lambda b: round(b / (1024**2))

    return {"free_mib": mib(free), "used_mib": mib(used), "total_mib": mib(total)}

def _generate_chunk(prompt: str, n: int, compute_dtype: str, guidance_scale: float, steps: int, seed_val: int):
    """
    1チャンクぶんのフレームを生成して PIL のリストで返す。
    - compute_dtype: "bf16" or "fp16"(autocastで演算精度を切替)
    - guidance_scale / steps: 推論制御
    - seed_val: 乱数シード(latentsをGPUで生成)
    """

    # 計算dtype(重みはロードdtypeのまま、演算dtypeだけ切替)

    autocast_dtype = torch.float16 if compute_dtype == "fp16" else torch.bfloat16

    # 乱数生成器は必ず CUDA 側

    gen = torch.Generator(device="cuda")
    if seed_val is not None and int(seed_val) >= 0:
        gen.manual_seed(int(seed_val))
    with torch.autocast("cuda", dtype=autocast_dtype):
        out = PIPE(
            prompt=prompt,
            num_frames=n,
            guidance_scale=guidance_scale,
            num_inference_steps=steps,
            generator=gen,
        )

    return normalize_to_rgb_list(out.frames)

def generate(prompt, num_frames, fps, compute_dtype, seed, guidance_scale, steps):

    # ==== リクエスト受信ログ ====

    req_id = str(uuid.uuid4())
    seed_val = int(seed) if (seed is not None and int(seed) >= 0) else random.randint(1, 2**31 - 1)
    torch.manual_seed(seed_val)
    total = int(num_frames)
    fps = int(fps)
    guidance_scale = float(guidance_scale)
    steps = int(steps)
    logger.info(json.dumps({
        "event": "request_received",
        "req_id": req_id,
        "prompt": prompt,
        "num_frames": total,
        "fps": fps,
        "dtype": compute_dtype,
        "seed": seed_val,
        "guidance_scale": guidance_scale,
        "steps": steps,
        "sdpa": sdpa_ok,
        "gpu": gpu_mem_info(),
    }, ensure_ascii=False))

    if total >= 400:
        gr.Info(f"長尺モード: 計 {total} フレームを分割生成します。時間がかかります。")

    # 出力先(CWD/outputs)

    out_dir = os.path.join(os.getcwd(), "outputs")
    os.makedirs(out_dir, exist_ok=True)
    out_path = os.path.join(out_dir, f"wan2v_{int(time.time())}.mp4")

    # 分割設定:チャンク97、ステップ96(先頭1フレーム重複→後続はスキップ)

    CHUNK = 97
    STEP = CHUNK - 1  # 96
    t0 = time.time()
    written = 0

    try:
        with LOCK, torch.inference_mode():

            # CFR で writer 初期化(互換性の高い固定フレームレート)
            writer = imageio.get_writer(
                out_path,
                fps=fps,
                codec="libx264",
                format="ffmpeg",

                # ffmpeg 警告対応:-vsync は非推奨 → -fps_mode に移行
                # -pix_fmt は imageio が指定することがあり重複警告が出るためここでは明示しない

                ffmpeg_params=["-fps_mode", "cfr"],
                macro_block_size=None,
            )

            try:

                # 1チャンク目(全フレームを書き込み)
                n0 = adjust_frames(min(total, CHUNK))
                first_frames = _generate_chunk(
                    prompt, n0, compute_dtype, guidance_scale, steps, seed_val
                )

                for img in first_frames:
                    writer.append_data(np.array(img))
                    written += 1

                # 2チャンク目以降:先頭1フレーム重複をスキップ

                start = STEP
                while start < total:
                    remain = total - start
                    n = adjust_frames(min(remain + 1, CHUNK))
                    frames = _generate_chunk(
                        prompt, n, compute_dtype, guidance_scale, steps, seed_val
                    )

                    for img in frames[1:]:
                        writer.append_data(np.array(img))
                        written += 1

                    start += STEP

            finally:
                writer.close()

        elapsed = round(time.time() - t0, 3)

        gr.Info(
            f"Saved: {os.path.relpath(out_path)} / frames={written} "
            f"/ elapsed={elapsed}s / seed={seed_val} / dtype={compute_dtype} / SDPA={sdpa_ok}"
        )

        # ==== 完了ログ ====

        logger.info(json.dumps({
            "event": "request_done",
            "req_id": req_id,
            "out": os.path.relpath(out_path),
            "frames": written,
            "elapsed_sec": elapsed,
            "gpu_after": gpu_mem_info(),
        }, ensure_ascii=False))

        return out_path

    except Exception as e:
        elapsed = round(time.time() - t0, 3)

        # ==== 失敗ログ ====

        logger.error(json.dumps({
            "event": "request_failed",
            "req_id": req_id,
            "error": repr(e),
            "trace": traceback.format_exc(),
            "elapsed_sec": elapsed,
            "gpu_after": gpu_mem_info(),
        }, ensure_ascii=False))

        raise  # エラーは Gradio 側にも伝搬

# ---- Gradio UI -------------------------------------------------------------

with gr.Blocks(title="Wan2.2 T2V-A14B (Diffusers) WebUI") as demo:
    gr.Markdown("### Wan2.2 T2V‑A14B — テキストから動画生成")
    with gr.Row():
        prompt = gr.Textbox(
            label="Prompt",
            value="cyberpunk rainy neon city street at night, cinematic, moody lighting, 4k",
            lines=3,
        )

    with gr.Row():
        num_frames = gr.Slider(17, 2000, value=97, step=1, label="num_frames(長尺可)")
        fps = gr.Slider(8, 30, value=24, step=1, label="fps")
        dtype = gr.Radio(choices=["bf16", "fp16"], value="bf16", label="compute dtype(H100:bf16推奨)")

    with gr.Row():
        guidance_scale = gr.Slider(1.0, 12.0, value=6.5, step=0.5, label="guidance_scale(CFG)")
        steps = gr.Slider(10, 80, value=50, step=1, label="num_inference_steps")
        seed = gr.Number(value=None, label="seed(未指定=ランダム)")

    btn = gr.Button("Generate", variant="primary")
    video = gr.Video(label="Result", autoplay=True)

    # 直列実行(GPU 共有のため)

    btn.click(
        fn=generate,
        inputs=[prompt, num_frames, fps, dtype, seed, guidance_scale, steps],
        outputs=,
        concurrency_limit=1
    )

demo.queue().launch(server_name="0.0.0.0", server_port=7860, share=False)
run.pyとapp.pyの実行
# コマンドラインから動画生成テスト実行
python /models/Wan2.2/run.py --model_path /models/Wan2.2/Wan2.2-T2V-A14B-Diffusers --prompt "cyberpunk city with neon lights, rainy night, cinematic" --output /models/output.mp4 --num_frames 49

# Gradio WebUIを起動
python /models/Wan2.2/app.py
構築手順
会員IDの取得、さくらのクラウドプロジェクトの作成
高火力 VRTを利用する場合、さくらインターネットの会員ID取得に加えて、さくらのクラウドのプロジェクト作成およびクレジットカードの登録が必要です。
参考:https://manual.sakura.ad.jp/cloud/payment/signup.html
クレジットカードの登録は、割引クーポンの利用などで課金が発生しない場合でも必須となります。
サーバーリソースの構築
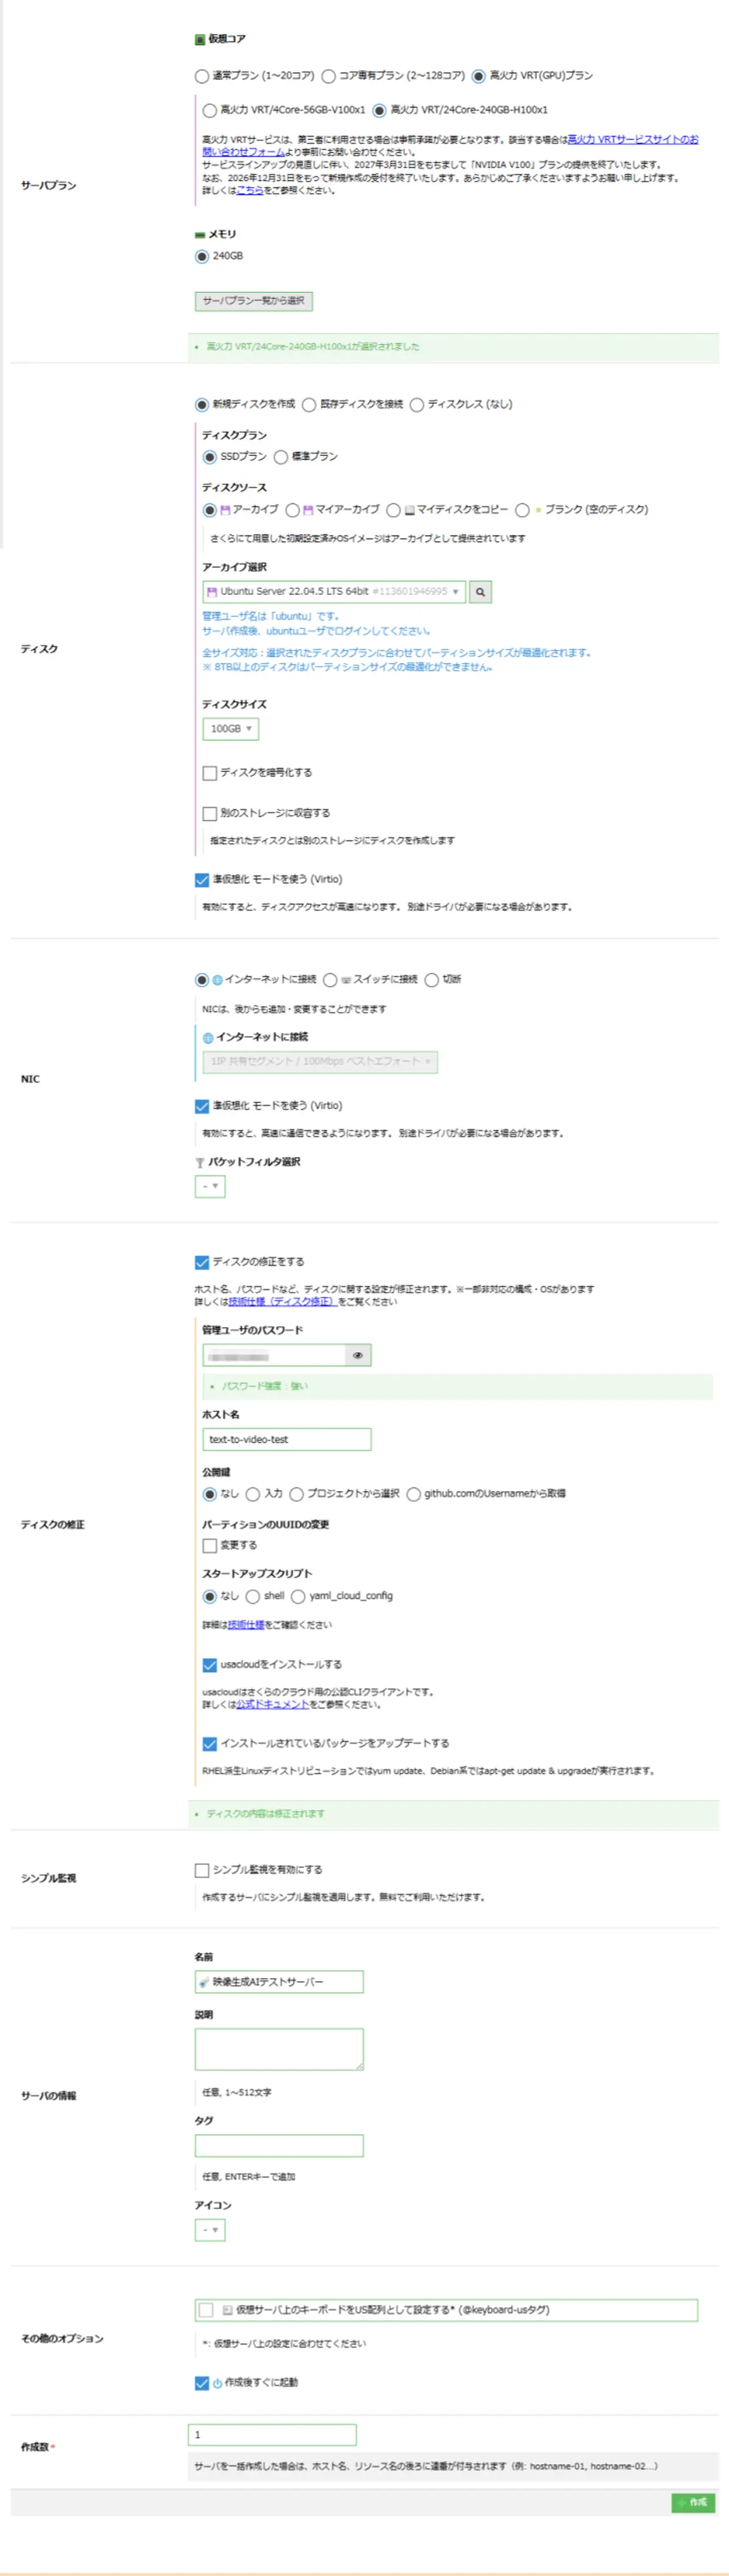
会員IDおよびプロジェクトを作成が完了している場合、さくらのクラウドのコントロールパネルで「サーバー新規作成」画面にアクセスし、以下パラメーターを設定して「作成」ボタンをクリックします。
GPUサーバーの場合各種確認が表示されますが、条件を満たすかご確認いただいたうえで作成を進めてください。
なお、表記が無いパラメーターはすべてデフォルト値を使用します。
参考:https://secure.sakura.ad.jp/cloud/iaas/#!/server/add/
- サーバプラン
- 仮想コア:高火力 VRT(GPU)プラン
- 高火力 VRT/24Core-240GB-H100x1
- メモリ:240GB ※固定
- 仮想コア:高火力 VRT(GPU)プラン
- ディスク
- アーカイブ選択:Ubuntu Server 22.04.5 LTS 64bit #113601946995
- ディスク選択:100GB
- ディスクの修正
- 管理ユーザのパスワード:※強度チェックを満たす任意の値
- ホスト名:text-to-video-test
- インストールされているパッケージをアップデートする:チェック
- サーバの情報
- 名前:映像生成AIテストサーバー
作成実行中はサーバーおよびディスクのリソース作成、さらにディスクのコピーの進捗が表示されます。
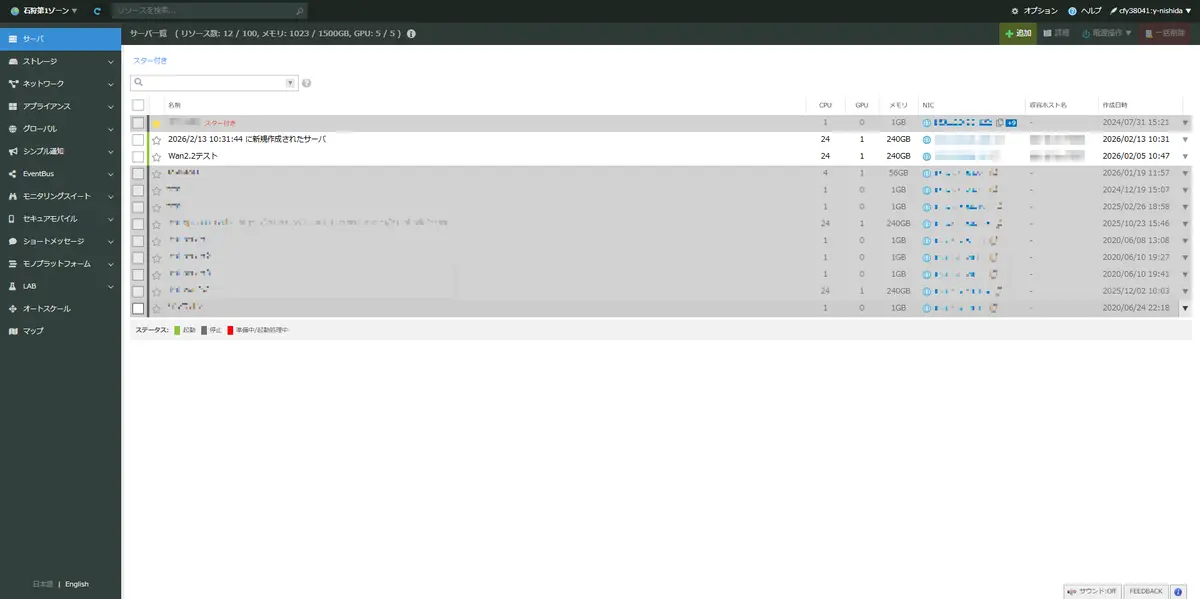
サーバーリソースが作成されると、一覧画面に表示されます。
サーバーでの作業
サーバーが立ち上がれば、以降の作業はサーバー側での作業となります。
ここではシンプルにWindowsのTeraTermを想定した操作方法を案内しますが、Macのターミナルや、セッションの維持が可能なターミナルマルチプレクサ(tmux)などで代用することもできます。
サーバーへのログイン
さくらのクラウドコントロールパネル「サーバ」メニュー内一覧の「NIC」欄から、対象サーバーのグローバルIPアドレスを確認します。
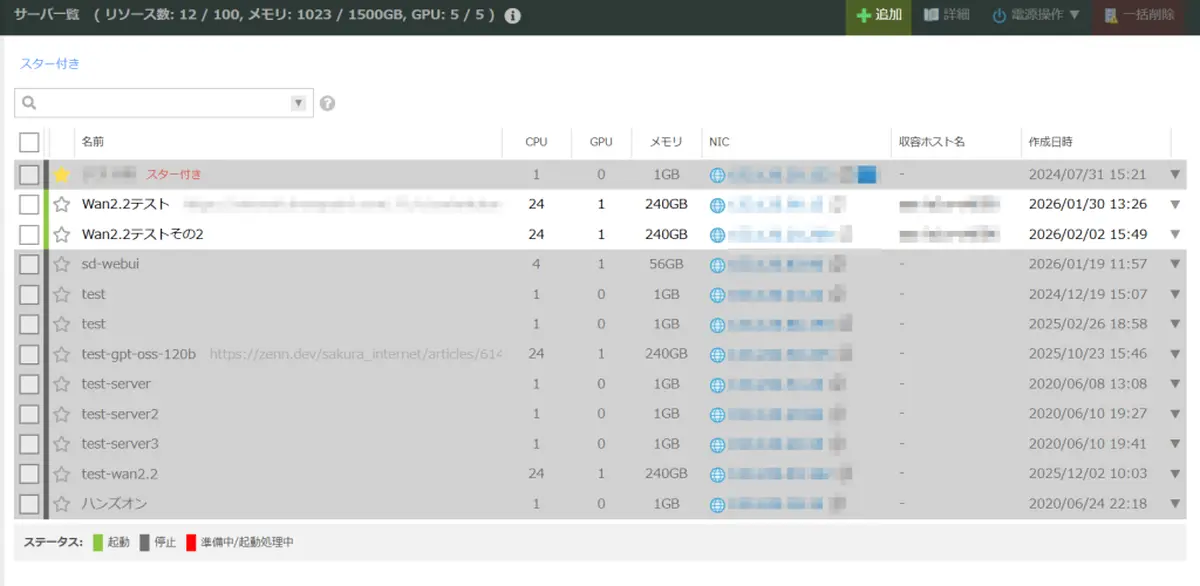
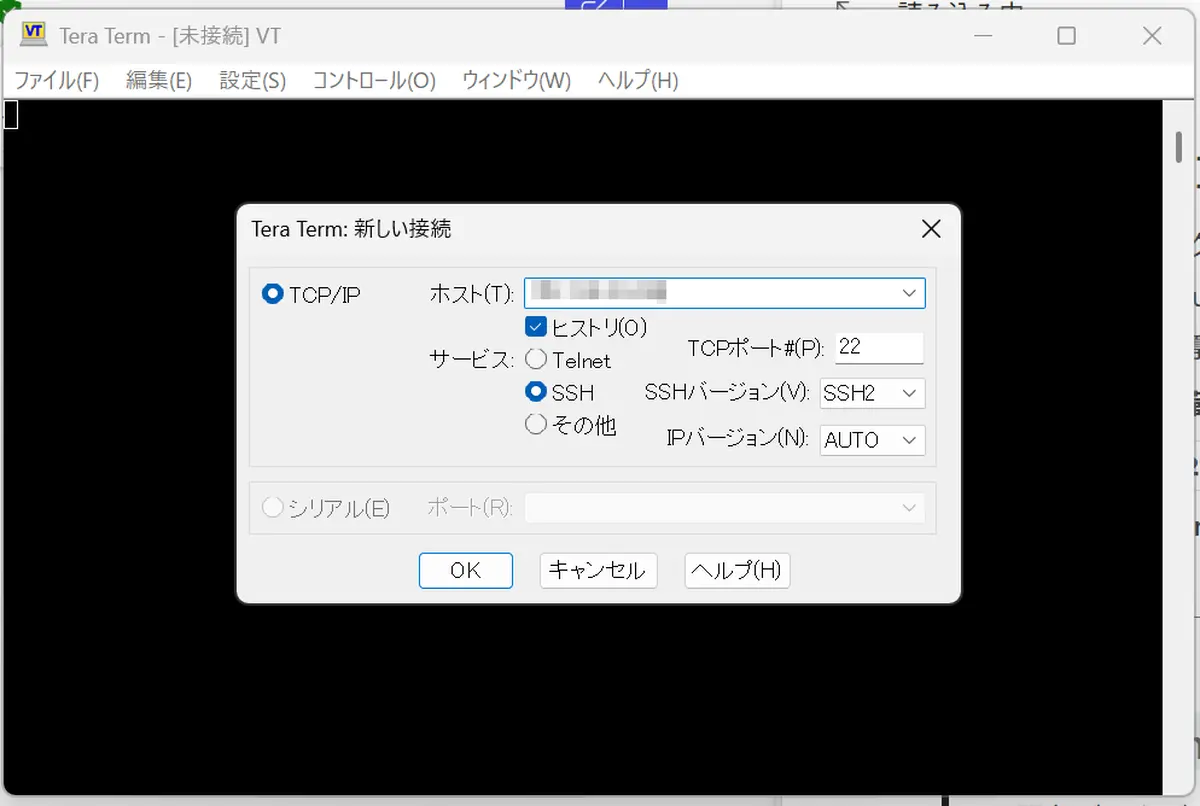
TeraTermを起動し、「ホスト」欄にコピーしたグローバルIPアドレスを貼付のうえ、OKをクリックします。
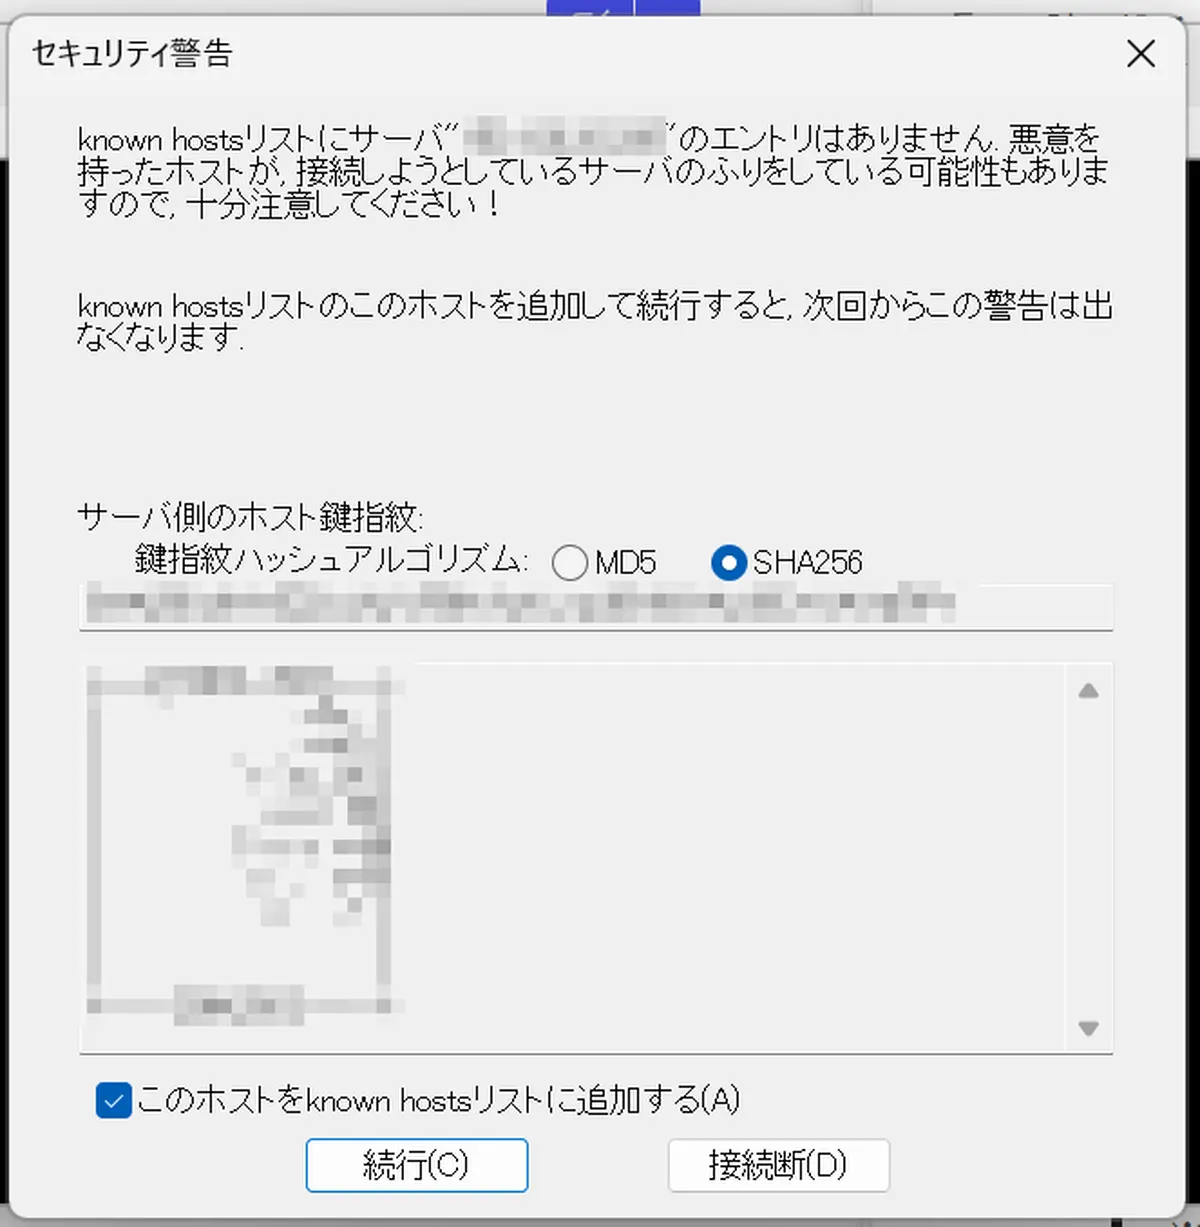
セキュリティ警告は確認したうえで「続行」をクリックします。
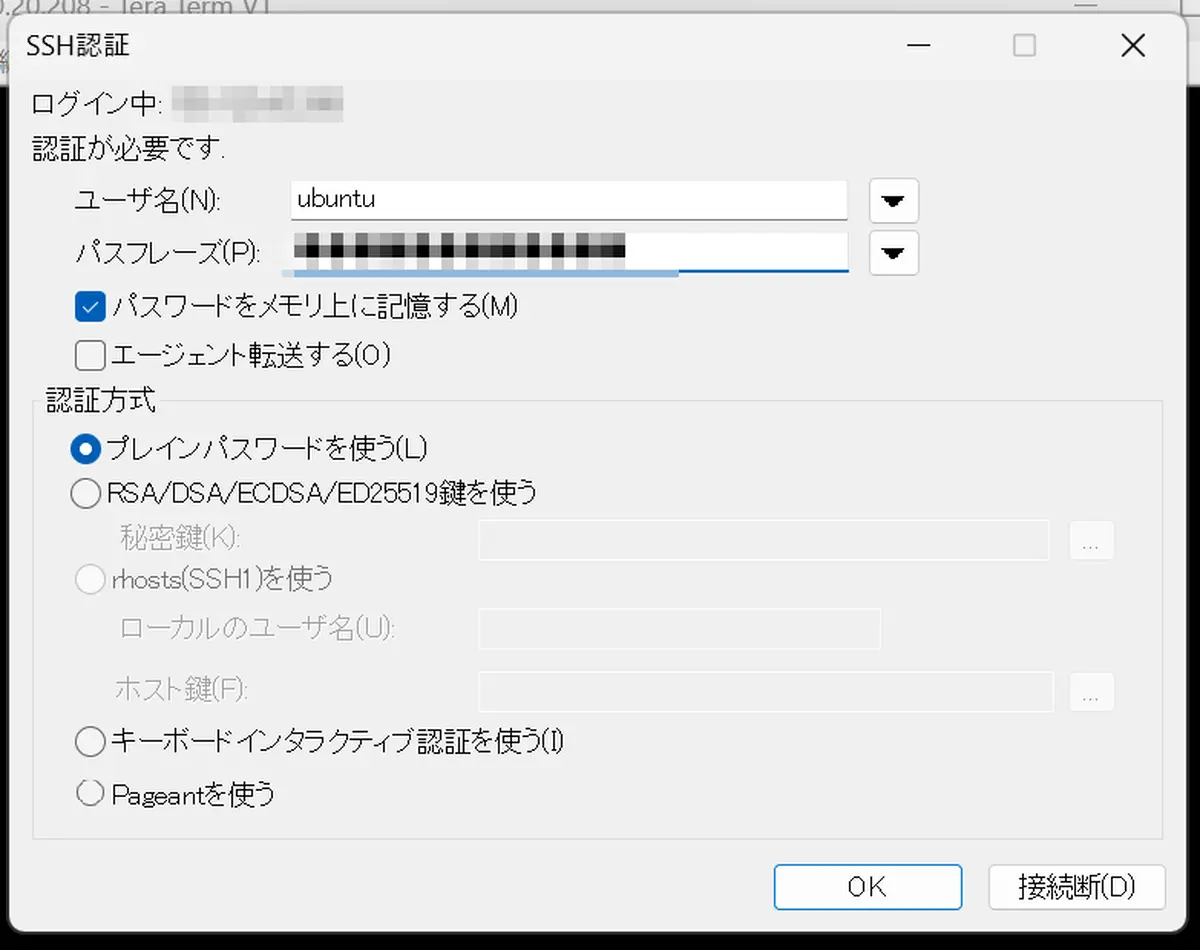
ユーザ名はubuntu、パスフレーズはサーバー作成時に指定した値を入力し、「OK」をクリックします。
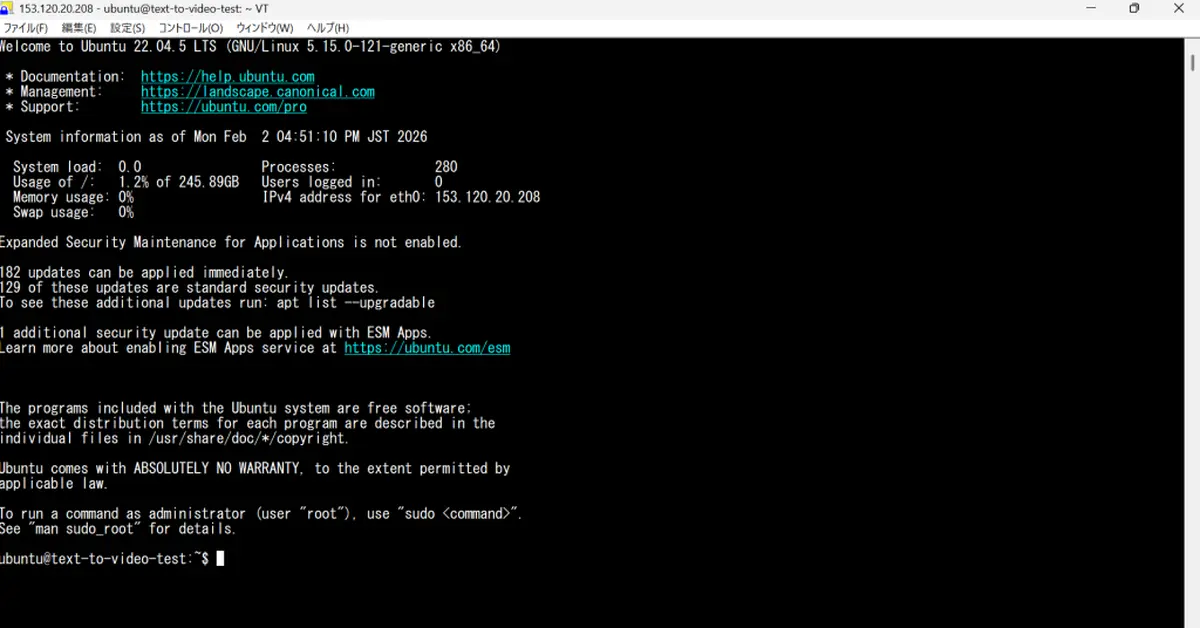
ログインが成功すると、以下のような表示がされます。
一時領域の準備(NVMeのマウント)
サーバー作成直後はNVMe領域はフォーマット済みで接続されているものの、まだマウントはされていません。
今回は念のためユーザー側でのフォーマット作業のうえ/modelsフォルダを作成し、対象のNVMeにマウントさせます。
NVMeデバイス /dev/nvme0n1 を ext4 でフォーマットする
ubuntu@text-to-video-test:~$ sudo mkfs.ext4 /dev/nvme0n1
[sudo] password for ubuntu:
mke2fs 1.46.5 (30-Dec-2021)
Discarding device blocks: done
Creating filesystem with 1875366486 4k blocks and 234422272 inodes
Filesystem UUID: 8920abfa-36c1-4448-8fb2-eb015f392f31
Superblock backups stored on blocks:
        32768, 98304, 163840, 229376, 294912, 819200, 884736, 1605632, 2654208,
        4096000, 7962624, 11239424, 20480000, 23887872, 71663616, 78675968,
        102400000, 214990848, 512000000, 550731776, 644972544

Allocating group tables: done
Writing inode tables: done
Creating journal (262144 blocks): done
Writing superblocks and filesystem accounting information: done
ルート配下に models ディレクトリを作成
ubuntu@text-to-video-test:~$ sudo mkdir -p /models
※出力なし
ubuntu@text-to-video-test:~$ ll /
total 76
drwxr-xr-x  20 root   root    4096 Feb  2 17:05 ./
drwxr-xr-x  20 root   root    4096 Feb  2 17:05 ../
lrwxrwxrwx   1 root   root       7 Sep 11  2024 bin -> usr/bin/
(中略)
drwxr-xr-x   2 ubuntu ubuntu  4096 Feb  2 17:05 models/
(後略)
/models を nvme0n1 にマウント
ubuntu@text-to-video-test:~$ sudo mount /dev/nvme0n1 /models
※出力なし
ubuntu@text-to-video-test:~$ mount | grep nvme0n1
/dev/nvme0n1 on /models type ext4 (rw,relatime,stripe=32)
NVIDIA 関連ソフトウェアのインストール
NVIDIAが提供しているCUDA Tool KitおよびGPUのドライバーをインストールします。
今回はオープンソース版のドライバーを利用します。
CUDAリポジトリのAPT優先度設定ファイルを取得
ubuntu@text-to-video-test:~$ wget https://developer.download.nvidia.com/compute/cuda/repos/ubuntu2204/x86_64/cuda-ubuntu2204.pin
--2026-02-03 10:46:03--  https://developer.download.nvidia.com/compute/cuda/repos/ubuntu2204/x86_64/cuda-ubuntu2204.pin
(中略)
2026-02-03 10:46:03 (158 MB/s) - ‘cuda-ubuntu2204.pin’ saved [190/190]
CUDAリポジトリの優先度を設定(APT pinning)
ubuntu@text-to-video-test:~$ sudo mv cuda-ubuntu2204.pin /etc/apt/preferences.d/cuda-repository-pin-600
※出力なし
CUDA 13.1 ローカルインストーラ(.deb)をダウンロード
ubuntu@text-to-video-test:~$ wget https://developer.download.nvidia.com/compute/cuda/13.1.1/local_installers/cuda-repo-ubuntu2204-13-1-local_13.1.1-590.48.01-1_amd64.deb
--2026-02-03 10:46:22--  https://developer.download.nvidia.com/compute/cuda/13.1.1/local_installers/cuda-repo-ubuntu2204-13-1-local_13.1.1-590.48.01-1_amd64.deb
(中略)
2026-02-03 10:47:04 (94.6 MB/s) - ‘cuda-repo-ubuntu2204-13-1-local_13.1.1-590.48.01-1_amd64.deb’ saved [4069469002/4069469002]
CUDAローカルリポジトリパッケージをインストール
ubuntu@text-to-video-test:~$ sudo dpkg -i cuda-repo-ubuntu2204-13-1-local_13.1.1-590.48.01-1_amd64.deb
Selecting previously unselected package cuda-repo-ubuntu2204-13-1-local.
(中略)
sudo cp /var/cuda-repo-ubuntu2204-13-1-local/cuda-59DFF246-keyring.gpg /usr/share/keyrings/
CUDAリポジトリのGPGキーをAPTキーストアへ配置
ubuntu@text-to-video-test:~$ sudo cp /var/cuda-repo-ubuntu2204-13-1-local/cuda-*-keyring.gpg /usr/share/keyrings/
※出力なし
パッケージリストの更新
ubuntu@text-to-video-test:~$ sudo apt-get updateCUDA Toolkit 13.1をインストール
ubuntu@text-to-video-test:~$ sudo apt-get -y install cuda-toolkit-13-1
Reading package lists... Done
(中略)
No VM guests are running outdated hypervisor (qemu) binaries on this host.
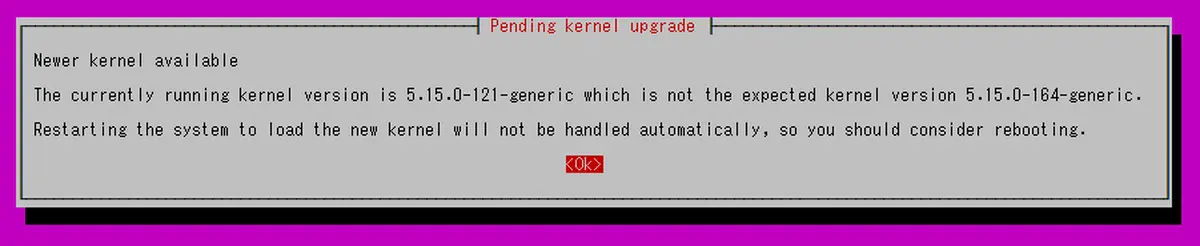
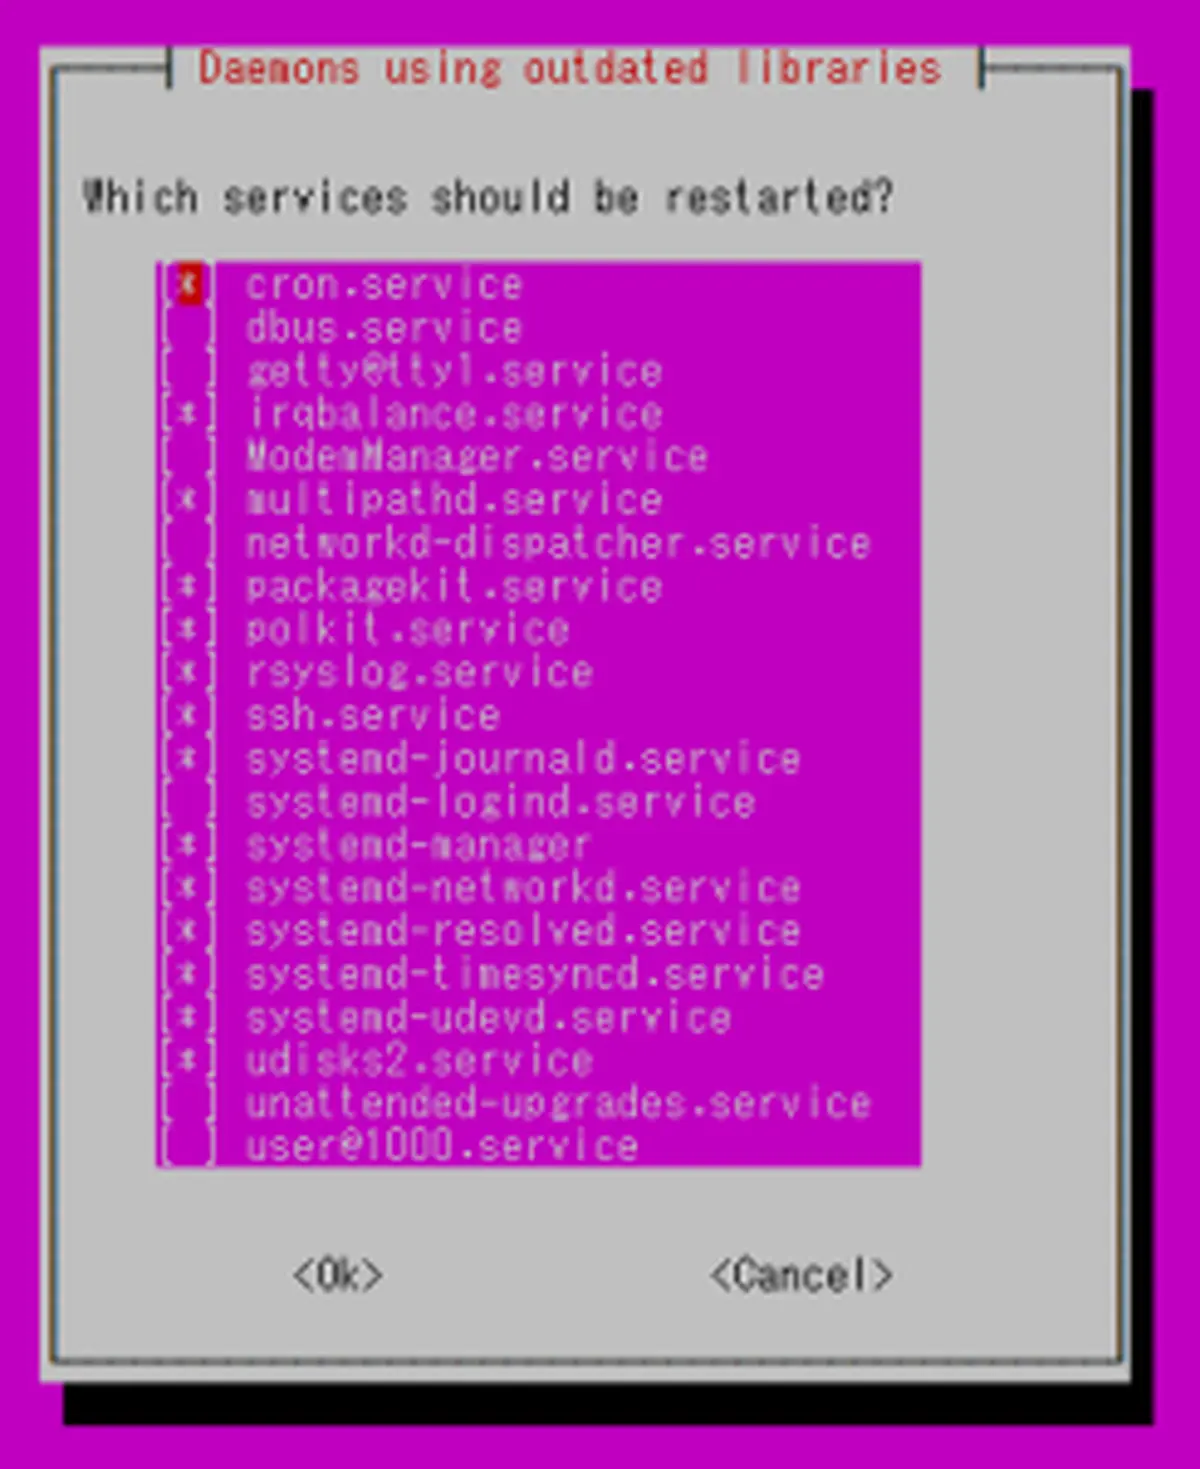
上記コマンドの実行中にいくつか下記のようなカーネルアップグレードの通知やサービスの再起動に関する確認が表示されます。
とくに変更は必要ないため、Enter押下で決定して次に進みます。
NVIDIA Open GPUカーネルモジュールをインストール
ubuntu@text-to-video-test:~$ sudo apt-get -y install nvidia-open

Reading package lists... Done

(中略)

No VM guests are running outdated hypervisor (qemu) binaries on this host.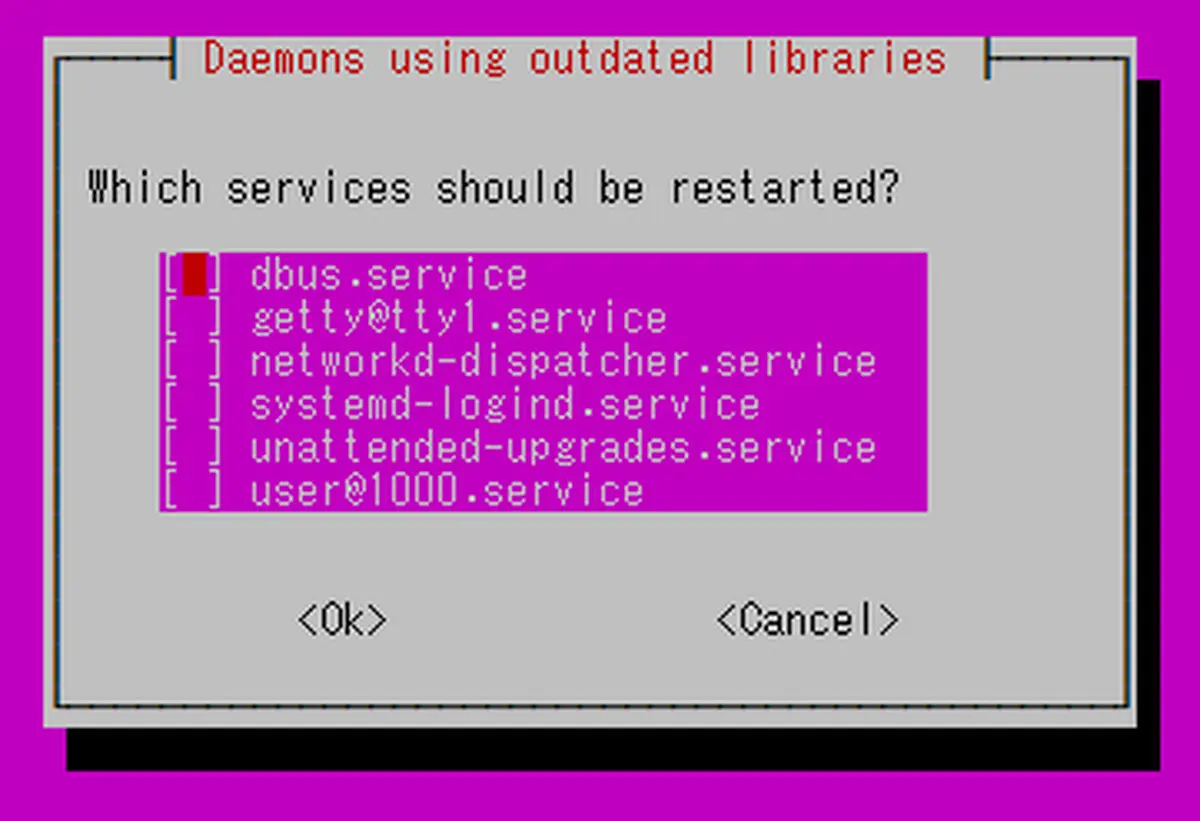
インストールが完了したら、nvidia-smiコマンドで、サーバー側でGPUを認識しているか確認します。
以下のようなGPUに関する情報が出力されたらインストールが成功しています。
GPUの認識確認(nvidia-smiコマンドの実行)
ubuntu@text-to-video-test:~$ nvidia-smi

Tue Feb  3 11:12:18 2026

+-----------------------------------------------------------------------------------------+

| NVIDIA-SMI 590.48.01              Driver Version: 590.48.01      CUDA Version: 13.1     |

+-----------------------------------------+------------------------+----------------------+

| GPU  Name                 Persistence-M | Bus-Id          Disp.A | Volatile Uncorr. ECC |

| Fan  Temp   Perf          Pwr:Usage/Cap |           Memory-Usage | GPU-Util  Compute M. |

|                                         |                        |               MIG M. |

|=========================================+========================+======================|

|   0  NVIDIA H100 80GB HBM3          Off |   00000000:00:04.0 Off |                    0 |

| N/A   27C    P0            116W /  700W |       0MiB /  81559MiB |      2%      Default |

|                                         |                        |             Disabled |

+-----------------------------------------+------------------------+----------------------+

+-----------------------------------------------------------------------------------------+

| Processes:                                                                              |

|  GPU   GI   CI              PID   Type   Process name                        GPU Memory |

|        ID   ID                                                               Usage      |

|=========================================================================================|

|  No running processes found                                                             |

+-----------------------------------------------------------------------------------------+
基本パッケージとvenvの準備
venvはPythonが公式に提供しているツールで、プロジェクト間のライブラリバージョン競合や環境汚染を防ぐために使用されます。
今回のケースではプロジェクト間の競合は起こりにくいですが、一般的な運用としてvenvを用いて環境を構築します。
必要なパッケージのインストール
ubuntu@text-to-video-test:~$ sudo apt-get -y install git python3-venv python3-dev build-essential ffmpeg libgl1

Reading package lists... Done

Building dependency tree... Done

Reading state information... Done

The following additional packages will be installed:

(中略)

Restarting services...

 systemctl restart cron.service irqbalance.service multipathd.service packagekit.service polkit.service rsyslog.service ssh.service systemd-journald.service systemd-networkd.service systemd-resolved.service systemd-timesyncd.service systemd-udevd.service udisks2.service

Service restarts being deferred:

 systemctl restart ModemManager.service

 /etc/needrestart/restart.d/dbus.service

 systemctl restart getty@tty1.service

 systemctl restart networkd-dispatcher.service

 systemctl restart systemd-logind.service

 systemctl restart unattended-upgrades.service

 systemctl restart user@1000.service

No containers need to be restarted.

No user sessions are running outdated binaries.

No VM guests are running outdated hypervisor (qemu) binaries on this host.
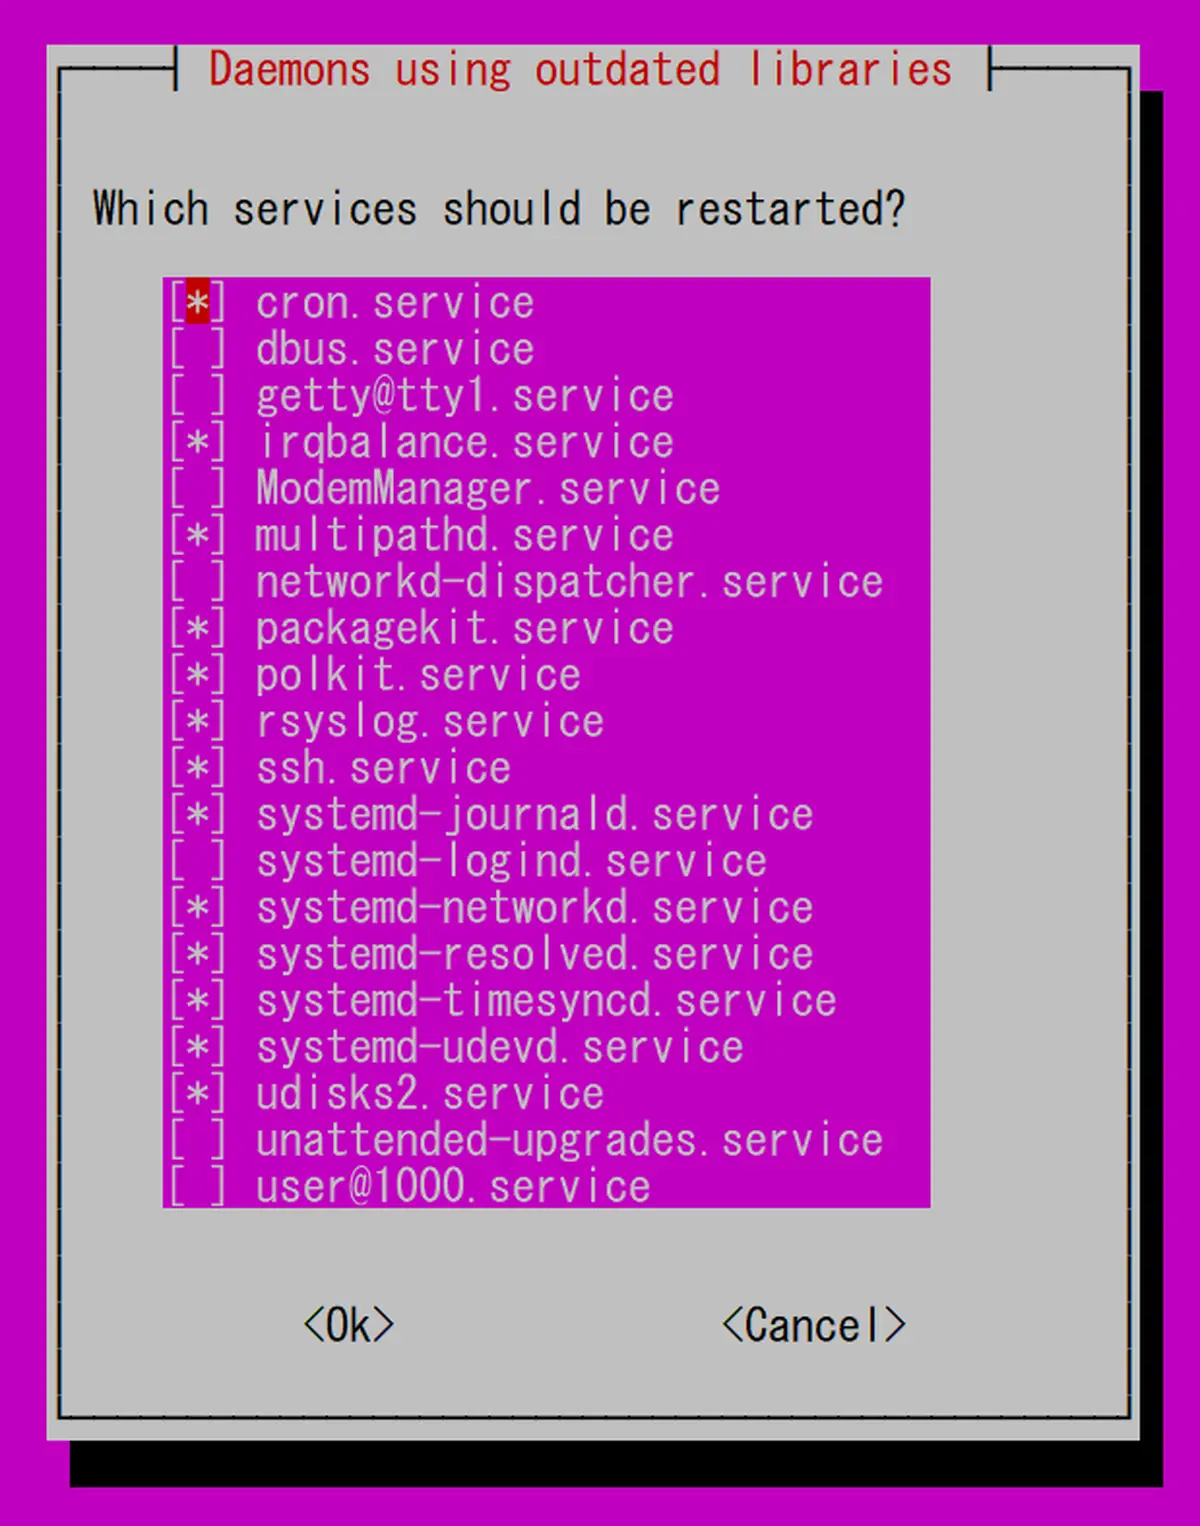
途中で発生する画面は先程と同様、デフォルトのままEnterを押下します。
作業ディレクトリをNVMe(/models)に作成
ubuntu@text-to-video-test:~$ sudo mkdir -p /models/Wan2.2 && cd /models/Wan2.2

※出力なし

ubuntu@text-to-video-test:/models/Wan2.2$ pwd

/models/Wan2.2
text2video環境を作成して起動
ubuntu@text-to-video-test:/models/Wan2.2$ sudo python3 -m venv text2video

※出力なし

ubuntu@text-to-video-test:/models/Wan2.2$ source text2video/bin/activate

(text2video) ubuntu@text-to-video-test:/models/Wan2.2$
以降はvenv環境ですべて作業を実行します。
venv内でのパッケージのインストール
venv環境内で今回のアプリケーション実行に必要となるパッケージをインストールします。
まずはインストールの起点となるpipをアップデートします。
/models ディレクトリの権限変更とpipのアップデート
(text2video) ubuntu@text-to-video-test:/models/Wan2.2$ sudo chown -R $USER:$USER /models

※出力なし

(text2video) ubuntu@text-to-video-test:/models/Wan2.2$ pip install -U pip

Requirement already satisfied: pip in ./text2video/lib/python3.10/site-packages (22.0.2)

Collecting pip

  Using cached pip-26.0-py3-none-any.whl (1.8 MB)

Installing collected packages: pip

  Attempting uninstall: pip

    Found existing installation: pip 22.0.2

    Uninstalling pip-22.0.2:

      Successfully uninstalled pip-22.0.2

Successfully installed pip-26.0
その後生成AIの実行で必要となるパッケージをバージョン固定が動作に影響を与えるものは固定するようにしてインストールします。
pytorch関連ソフトウェアインストール(要バージョン固定)
(text2video) ubuntu@text-to-video-test:/models/Wan2.2$ pip install torch==2.5.1 torchvision==0.20.1 torchaudio==2.5.1 --index-url https://download.pytorch.org/whl/cu121

Looking in indexes: https://download.pytorch.org/whl/cu121

Collecting torch==2.5.1

Downloading https://download.pytorch.org/whl/cu121/torch-2.5.1%2Bcu121-cp310-cp310-linux_x86_64.whl (780.4 MB)

(中略)

Successfully installed MarkupSafe-2.1.5 filelock-3.20.0 fsspec-2025.12.0 jinja2-3.1.6 mpmath-1.3.0 networkx-3.4.2 numpy-2.2.6 nvidia-cublas-cu12-12.1.3.1 nvidia-cuda-cupti-cu12-12.1.105 nvidia-cuda-nvrtc-cu12-12.1.105 nvidia-cuda-runtime-cu12-12.1.105 nvidia-cudnn-cu12-9.1.0.70 nvidia-cufft-cu12-11.0.2.54 nvidia-curand-cu12-10.3.2.106 nvidia-cusolver-cu12-11.4.5.107 nvidia-cusparse-cu12-12.1.0.106 nvidia-nccl-cu12-2.21.5 nvidia-nvjitlink-cu12-12.9.86 nvidia-nvtx-cu12-12.1.105 pillow-12.0.0 sympy-1.13.1 torch-2.5.1+cu121 torchaudio-2.5.1+cu121 torchvision-0.20.1+cu121 triton-3.1.0 typing-extensions-4.15.0
生成AI実行関連のソフトウェアインストール
(text2video) ubuntu@text-to-video-test:/models/Wan2.2$ pip install -U ftfy sentencepiece imageio imageio-ffmpeg

Collecting ftfy
  Downloading ftfy-6.3.1-py3-none-any.whl.metadata (7.3 kB)

(中略)

Successfully installed ftfy-6.3.1 imageio-2.37.3 imageio-ffmpeg-0.6.0 sentencepiece-0.2.1 wcwidth-0.8.2
生成AI実行関連のソフトウェアインストール(要バージョン固定)
(text2video) ubuntu@text-to-video-test:/models/Wan2.2$ pip install "diffusers==0.36.0" "transformers==4.57.6" "accelerate==1.12.0" "huggingface-hub==0.36.2" "gradio==5.50.0"

Collecting diffusers==0.36.0

(中略)

Successfully installed Pillow-11.3.0 accelerate-1.12.0 aiofiles-24.1.0 annotated-doc-0.0.4 annotated-types-0.7.0 anyio-4.14.1 brotli-1.2.0 certifi-2026.6.17 charset_normalizer-3.4.9 click-8.4.2 diffusers-0.36.0 exceptiongroup-1.3.1 fastapi-0.139.0 ffmpy-1.0.0 gradio-5.50.0 gradio-client-1.14.0 groovy-0.1.2 h11-0.16.0 hf-xet-1.5.1 httpcore-1.0.9 httpx-0.28.1 huggingface-hub-0.36.2 idna-3.18 importlib_metadata-9.0.0 markdown-it-py-4.2.0 mdurl-0.1.2 orjson-3.11.9 packaging-26.2 pandas-2.3.3 psutil-7.2.2 pydantic-2.12.3 pydantic-core-2.41.4 pydub-0.25.1 pygments-2.20.0 python-dateutil-2.9.0.post0 python-multipart-0.0.32 pytz-2026.2 pyyaml-6.0.3 regex-2026.6.28 requests-2.34.2 rich-15.0.0 ruff-0.15.21 safehttpx-0.1.7 safetensors-0.8.0 semantic-version-2.10.0 shellingham-1.5.4 six-1.17.0 starlette-0.52.1 tokenizers-0.22.2 tomlkit-0.13.3 tqdm-4.68.4 transformers-4.57.6 typer-0.26.8 typing-inspection-0.4.2 tzdata-2026.2 urllib3-2.7.0 uvicorn-0.51.0 websockets-15.0.1 zipp-4.1.0
依存関係の確認
(text2video) ubuntu@text-to-video-test:/models/Wan2.2$ pip check
No broken requirements found.
インストールが終わった後、pip checkコマンドで依存関係が崩れていないことを確認します。
もしVer指定せずにインストールしたパッケージがアップデートなどが原因で依存関係が崩れた場合は本内容を元にVer.指定してインストールし直します。
Hugging Faceから映像生成モデルの取得
このあと、Wan2.2のモデルをHugging Faceから取得するため、事前にアカウントを作成しておきます。
アカウント作成後は、サーバー側からHugging Faceに対して認証し、AIモデルをダウンロードできるようにするため、サーバー側で秘密鍵および公開鍵のペアを作成し、Hugging Faceに公開鍵を登録します。
なお、Hugging Faceではパスワード認証の提供を終了し、鍵認証の利用が必須になっています。
そのため、まずはサーバー側でSSH Keyを作成します。
ファイルの保存場所を尋ねられますが、デフォルト(/home/ubuntu/.ssh/id_ed25519)でとくに問題がなければEnterを押下します。続いて、該当のファイルに対するPassphraseを設定するとid_ed25519.pubファイルが作成されます。
なお、コマンド実行時に指定されている”your.email@example.co”については、ダブルクォーテーションも含めて消し、自身のメールアドレスなど適切な値に置き換えてください。
サーバーからHugging Faceへのコマンドラインを実行するためのSSH Keyを作成
(text2video) ubuntu@text-to-video-test:/models/Wan2.2$ ssh-keygen -t ed25519 -C "your.email@example.co" # 任意のメールアドレスに変更

Generating public/private ed25519 key pair.

Enter file in which to save the key (/home/ubuntu/.ssh/id_ed25519):

Created directory '/home/ubuntu/.ssh'.

Enter passphrase (empty for no passphrase):

Enter same passphrase again:

Your identification has been saved in /home/ubuntu/.ssh/id_ed25519

Your public key has been saved in /home/ubuntu/.ssh/id_ed25519.pub

The key fingerprint is:

SHA256:*******************************************

The key's randomart image is:

+--[ED25519 256]--+

(中略)

+----[SHA256]-----+(text2video)

ubuntu@text-to-video-test:/models/Wan2.2$ cat /home/ubuntu/.ssh/id_ed25519.pub

ssh-ed25519 ***************************************** ******@sakura.ad.jp
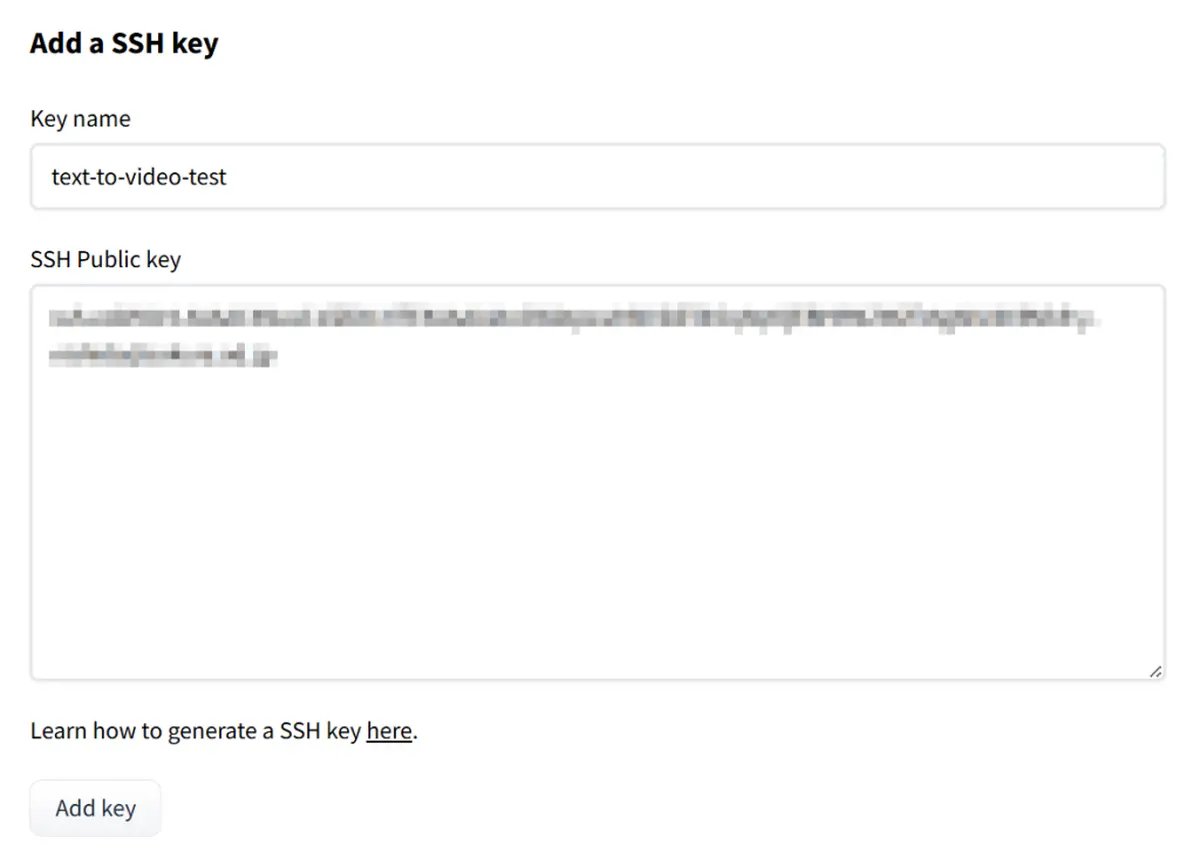
Hugging FaceへのSSH Keyの登録をするため、以下URLにブラウザでアクセスし、SSH Public Keyに前述の cat コマンドで出力された「ssh-ed25519 から メールアドレスまで」の1行を転記し Add Key をクリックします。
Key nameはラベルのため、任意の値を入力します。
https://huggingface.co/settings/keys
次に、pythonコマンドを用いて、Hugging FaceにあるWan-AI/Wan2.2-T2V-A14B-Diffusersモデルをダウンロードします。
当該モデルは容量が大きく、標準的な方法ではファイルが欠落する可能性もあるため、それらを避けるために以下のコマンドでダウンロードを行います。
Wan-AI/Wan2.2-T2V-A14B-Diffusers モデルのダウンロード
(text2video) ubuntu@text-to-video-test:/models/Wan2.2$ python -c "from huggingface_hub import snapshot_download; snapshot_download(repo_id='Wan-AI/Wan2.2-T2V-A14B-Diffusers', repo_type='model', local_dir='./Wan2.2-T2V-A14B-Diffusers', local_dir_use_symlinks=False, resume_download=True); print('model snapshot done')"

/models/Wan2.2/text2video/lib/python3.10/site-packages/huggingface_hub/utils/_validators.py:186: UserWarning: The `resume_download` argument is deprecated and ignored in `snapshot_download`. Downloads always resume whenever possible.

warnings.warn(

/models/Wan2.2/text2video/lib/python3.10/site-packages/huggingface_hub/utils/_validators.py:202: UserWarning: The `local_dir_use_symlinks` argument is deprecated and ignored in `snapshot_download`. Downloading to a local directory does not use symlinks anymore.

warnings.warn(

Downloading (incomplete total...): 0%| | 0.00/56.3k [00:00<?, ?B/s]Warning: You are sending unauthenticated requests to the HF Hub. Please set a HF_TOKEN to enable higher rate limits and faster downloads.

(中略)

Fetching 49 files: 100%|█████████████████████| 49/49 [02:14<00:00, 2.74s/it]

Download complete: : 126GB [02:14, 787MB/s] model snapshot done

Download complete: : 126GB [02:14, 939MB/s]
ダウンロードが完了したら、動画生成を実行するために必要なjsonファイルが揃っているかを簡易的に検証します。
ダウンロードしたモデルファイル一式の所在を確認
(text2video) ubuntu@text-to-video-test:/models/Wan2.2$ for f in model_index.json transformer/config.json text_encoder/config.json vae/config.json scheduler/scheduler_config.json tokenizer/tokenizer_config.json; do if [ -f "/models/Wan2.2/Wan2.2-T2V-A14B-Diffusers/$f" ]; then echo "$f OK"; else echo "$f MISSING"; fi; done

model_index.json OK

transformer OK

text_encoder OK

vae OK

scheduler OK

tokenizer OK
実行ファイルの作成(動作確認用とWebUI動作用)
ファイルが正しく揃っていることが確認できたら(6つのjsonファイルの所在がすべてOKで返ってきたら問題ありません)、続いて動作確認用のrun.pyとWeb動作用のapp.pyの2つのファイルを作成します。
run.pyファイルを作成(import~print行までをvimコマンドコピペ)
import argparse, os, torch, numpy as np, imageio
from PIL import Image
from diffusers import DiffusionPipeline
from diffusers.utils import numpy_to_pil

# 断片化対策(任意だが推奨)

os.environ.setdefault("PYTORCH_CUDA_ALLOC_CONF", "expandable_segments:True")

parser = argparse.ArgumentParser()
parser.add_argument("--model_path", type=str, required=True)
parser.add_argument("--prompt", type=str, required=True)
parser.add_argument("--output", type=str, default="output.mp4")
parser.add_argument("--num_frames", type=int, default=97)    # (N-1)%4==0 推奨域
parser.add_argument("--dtype", choices=["fp16","bf16"], default="bf16")
parser.add_argument("--fps", type=int, default=24)
parser.add_argument("--guidance_scale", type=float, default=6.5)
parser.add_argument("--steps", type=int, default=50)
parser.add_argument("--seed", type=int, default=0)

args = parser.parse_args()
assert os.path.isdir(args.model_path), f"model_path not found: {args.model_path}"
torch.backends.cuda.matmul.allow_tf32 = True
dtype = torch.bfloat16 if args.dtype == "bf16" else torch.float16

# (N-1)%4==0 補正

if (args.num_frames - 1) % 4 != 0:
    down = args.num_frames - ((args.num_frames - 1) % 4)
    up   = down + 4
    args.num_frames = min([down, up], key=lambda x: abs(x - args.num_frames))
    print(f"[info] adjusted num_frames to {args.num_frames}")

# 1) パイプライン読み込み:torch_dtype を明示

pipe = DiffusionPipeline.from_pretrained(args.model_path, torch_dtype=dtype)

# 2) xFormers を明示的に無効化

try:
    pipe.disable_xformers_memory_efficient_attention()
    print("[info] xFormers disabled.")

except Exception:
    pass

# 3) SDPA を有効化(失敗しても動くようにガード)

sdpa_ok = False

try:
    pipe.enable_sdpa()
    sdpa_ok = True
    print("[info] SDPA enabled.")

except Exception as e:
    print(f"[warn] enable_sdpa failed: {e}")

# 4) 段階的 CPU オフロード(ピークVRAM抑制)

pipe.enable_sequential_cpu_offload()

# 5) VAE 最適化

pipe.vae.enable_tiling()
pipe.vae.enable_slicing()
pipe.vae.to(dtype=torch.float16)

# 6) 乱数は CUDA(latents を GPU 生成)+ sdpa backend のログ

g = torch.Generator(device="cuda")

if args.seed and args.seed > 0:
    g.manual_seed(args.seed)

print(f"[info] dtype={dtype}, sdpa={sdpa_ok}")

with torch.autocast("cuda", dtype=dtype):
    result = pipe(
        prompt=args.prompt,
        num_frames=args.num_frames,
        guidance_scale=args.guidance_scale,
        num_inference_steps=args.steps,
        generator=g,
    )

raw_frames = result.frames

# --- 多枚化も含めた RGB 正規化 ---

from typing import List

def normalize_to_rgb_list(item) -> List[Image.Image]:
    imgs = []

    if isinstance(item, Image.Image):
        return [item if item.mode == "RGB" else item.convert("RGB")]

    if isinstance(item, torch.Tensor):
        arr = item.detach().cpu().float().numpy()

    else:
        arr = np.asarray(item)

    if arr.ndim == 4:  # (T,H,W,C)
        for sub in arr:
            pil_list = numpy_to_pil(sub)
            seq = pil_list if isinstance(pil_list, list) else [pil_list]
            for im in seq:
                imgs.append(im if im.mode == "RGB" else im.convert("RGB"))

    else:
        pil_list = numpy_to_pil(arr)
        seq = pil_list if isinstance(pil_list, list) else [pil_list]
        for im in seq:
            imgs.append(im if im.mode == "RGB" else im.convert("RGB"))

    return imgs

frames_rgb = []

for it in raw_frames:
    frames_rgb.extend(normalize_to_rgb_list(it))

# --- CFR でエクスポート(互換性&秒数を揃える) ---

writer = imageio.get_writer(
    args.output,
    fps=args.fps,
    codec="libx264",
    format="ffmpeg",
    ffmpeg_params=["-pix_fmt", "yuv420p", "-vsync", "cfr"],
    macro_block_size=None,
)

try:
    for img in frames_rgb:
        writer.append_data(np.array(img))

finally:
    writer.close()

print("Saved:", args.output)
print(f"[debug] frames={len(frames_rgb)} fps={args.fps} expected_sec={len(frames_rgb)/args.fps:.3f}")
app.pyファイルの作成(import~demo.queue行までをvimコマンドコピペ)
(text2video) ubuntu@text-to-video-test:/models/Wan2.2$ vim app.py

※以下コピペ

import os, time, random, threading, traceback, json, uuid, logging
from logging.handlers import RotatingFileHandler
from typing import List
import numpy as np
import torch, gradio as gr, imageio
from PIL import Image
from diffusers import DiffusionPipeline
from diffusers.utils import numpy_to_pil

# ------------------------------------------------------------

# 断片化対策(任意だが推奨)

os.environ.setdefault("PYTORCH_CUDA_ALLOC_CONF", "expandable_segments:True")

# ロギング設定(標準出力 + ローテーションファイル)

LOG_DIR = os.path.join(os.getcwd(), "logs")
os.makedirs(LOG_DIR, exist_ok=True)
LOG_PATH = os.path.join(LOG_DIR, "app.log")
logger = logging.getLogger("wan2v.app")
logger.setLevel(logging.INFO)
if not logger.handlers:
    fmt = logging.Formatter(
        fmt="%(asctime)s %(levelname)s [%(name)s] %(message)s",
        datefmt="%Y-%m-%d %H:%M:%S",
    )
    sh = logging.StreamHandler()
    sh.setFormatter(fmt)
    logger.addHandler(sh)
    fh = RotatingFileHandler(LOG_PATH, maxBytes=10 * 1024 * 1024, backupCount=5)
    fh.setFormatter(fmt)
    logger.addHandler(fh)
logger.info("==== Wan2.2 T2V-A14B Gradio server starting ====")

# ------------------------------------------------------------

MODEL_DIR = "/models/Wan2.2/Wan2.2-T2V-A14B-Diffusers"

# H100/近代GPU向け

torch.backends.cuda.matmul.allow_tf32 = True

# ロード dtype 既定(H100は bf16 推奨)

LOAD_DTYPE = torch.bfloat16

# ---- Pipeline 準備 ----------------------------------------------------------
# 注意:offloadを使うため、ここでは .to("cuda") は行わない

PIPE = DiffusionPipeline.from_pretrained(MODEL_DIR, torch_dtype=LOAD_DTYPE)

# xFormers を明示的に無効化

try:
    PIPE.disable_xformers_memory_efficient_attention()
    logger.info("[info] xFormers disabled.")

except Exception:
    pass

# SDPA を試行(未実装環境もあるため例外は握りつぶして警告)

sdpa_ok = False
try:
    PIPE.enable_sdpa()
    sdpa_ok = True
    logger.info("[info] SDPA enabled.")

except Exception as e:
    logger.warning(f"[warn] enable_sdpa failed: {e}")

# 段階的CPUオフロード(ピークVRAM削減)

PIPE.enable_sequential_cpu_offload()   # or: PIPE.enable_model_cpu_offload()

# VAE 最適化:タイル/スライス + VAEだけ fp16

PIPE.vae.enable_tiling()
PIPE.vae.enable_slicing()
PIPE.vae.to(dtype=torch.float16)
LOCK = threading.Lock()

# ---- Utility ---------------------------------------------------------------

def adjust_frames(n: int) -> int:
    """(N-1)%4==0 に最寄りで丸める(Wan系列の推奨制約)"""
    if (n - 1) % 4 == 0:
        return n
    down = n - ((n - 1) % 4)
    up = down + 4
    return min([down, up], key=lambda x: abs(x - n))

def normalize_to_rgb_list(item) -> List[Image.Image]:
    """
    任意の item (PIL / np.ndarray / torch.Tensor / それらのNバッチ) を
    3ch(RGB) の PIL.Image(uint8) のリストに正規化して返す。
    - 先頭のバッチ次元はすべて展開(=フラット)
    - CHW っぽい並びの場合は HWC に転置
    - 最終的に必ず RGB に統一
    """
    imgs: List[Image.Image] = []

    # すでに PIL

    if isinstance(item, Image.Image):
        return [item if item.mode == "RGB" else item.convert("RGB")]

    # Tensor → numpy、その他は numpy 化

    if isinstance(item, torch.Tensor):
        arr = item.detach().cpu().float().numpy()

    else:
        arr = np.asarray(item)

    # 先頭のバッチ次元をすべてフラット化(…×H×W×C に揃える)

    if arr.ndim >= 4:
        H, W, C = arr.shape[-3], arr.shape[-2], arr.shape[-1]
        arr = arr.reshape(-1, H, W, C)
        chunks = [arr[i] for i in range(arr.shape[0])]

    else:
        chunks = [arr]

    # 各チャンクを PIL に変換

    for a in chunks:

        # CHW(=3,H,W) など、チャネルが先頭に居るパターンを HWC に補正

        if a.ndim == 3 and a.shape[-1] not in (1, 3, 4) and a.shape[0] in (1, 3, 4):
            a = np.transpose(a, (1, 2, 0))  # (H,W,C) 化

        # 2次元(=Gray)でも OK(あとで RGB に変換)

        pil_list = numpy_to_pil(a)
        seq = pil_list if isinstance(pil_list, list) else [pil_list]
        for im in seq:
            imgs.append(im if im.mode == "RGB" else im.convert("RGB"))

    return imgs

def gpu_mem_info():

    """(free, total, used) を MiB で返す簡易メトリクス"""

    if not torch.cuda.is_available():
        return None
    free, total = torch.cuda.mem_get_info()
    used = total - free
    mib = lambda b: round(b / (1024**2))

    return {"free_mib": mib(free), "used_mib": mib(used), "total_mib": mib(total)}

def _generate_chunk(prompt: str, n: int, compute_dtype: str, guidance_scale: float, steps: int, seed_val: int):
    """
    1チャンクぶんのフレームを生成して PIL のリストで返す。
    - compute_dtype: "bf16" or "fp16"(autocastで演算精度を切替)
    - guidance_scale / steps: 推論制御
    - seed_val: 乱数シード(latentsをGPUで生成)
    """

    # 計算dtype(重みはロードdtypeのまま、演算dtypeだけ切替)

    autocast_dtype = torch.float16 if compute_dtype == "fp16" else torch.bfloat16

    # 乱数生成器は必ず CUDA 側

    gen = torch.Generator(device="cuda")
    if seed_val is not None and int(seed_val) >= 0:
        gen.manual_seed(int(seed_val))
    with torch.autocast("cuda", dtype=autocast_dtype):
        out = PIPE(
            prompt=prompt,
            num_frames=n,
            guidance_scale=guidance_scale,
            num_inference_steps=steps,
            generator=gen,
        )

    return normalize_to_rgb_list(out.frames)

def generate(prompt, num_frames, fps, compute_dtype, seed, guidance_scale, steps):

    # ==== リクエスト受信ログ ====

    req_id = str(uuid.uuid4())
    seed_val = int(seed) if (seed is not None and int(seed) >= 0) else random.randint(1, 2**31 - 1)
    torch.manual_seed(seed_val)
    total = int(num_frames)
    fps = int(fps)
    guidance_scale = float(guidance_scale)
    steps = int(steps)
    logger.info(json.dumps({
        "event": "request_received",
        "req_id": req_id,
        "prompt": prompt,
        "num_frames": total,
        "fps": fps,
        "dtype": compute_dtype,
        "seed": seed_val,
        "guidance_scale": guidance_scale,
        "steps": steps,
        "sdpa": sdpa_ok,
        "gpu": gpu_mem_info(),
    }, ensure_ascii=False))

    if total >= 400:
        gr.Info(f"長尺モード: 計 {total} フレームを分割生成します。時間がかかります。")

    # 出力先(CWD/outputs)

    out_dir = os.path.join(os.getcwd(), "outputs")
    os.makedirs(out_dir, exist_ok=True)
    out_path = os.path.join(out_dir, f"wan2v_{int(time.time())}.mp4")

    # 分割設定:チャンク97、ステップ96(先頭1フレーム重複→後続はスキップ)

    CHUNK = 97
    STEP = CHUNK - 1  # 96
    t0 = time.time()
    written = 0

    try:
        with LOCK, torch.inference_mode():

            # CFR で writer 初期化(互換性の高い固定フレームレート)
            writer = imageio.get_writer(
                out_path,
                fps=fps,
                codec="libx264",
                format="ffmpeg",

                # ffmpeg 警告対応:-vsync は非推奨 → -fps_mode に移行
                # -pix_fmt は imageio が指定することがあり重複警告が出るためここでは明示しない

                ffmpeg_params=["-fps_mode", "cfr"],
                macro_block_size=None,
            )

            try:

                # 1チャンク目(全フレームを書き込み)
                n0 = adjust_frames(min(total, CHUNK))
                first_frames = _generate_chunk(
                    prompt, n0, compute_dtype, guidance_scale, steps, seed_val
                )

                for img in first_frames:
                    writer.append_data(np.array(img))
                    written += 1

                # 2チャンク目以降:先頭1フレーム重複をスキップ

                start = STEP
                while start < total:
                    remain = total - start
                    n = adjust_frames(min(remain + 1, CHUNK))
                    frames = _generate_chunk(
                        prompt, n, compute_dtype, guidance_scale, steps, seed_val
                    )

                    for img in frames[1:]:
                        writer.append_data(np.array(img))
                        written += 1

                    start += STEP

            finally:
                writer.close()

        elapsed = round(time.time() - t0, 3)

        gr.Info(
            f"Saved: {os.path.relpath(out_path)} / frames={written} "
            f"/ elapsed={elapsed}s / seed={seed_val} / dtype={compute_dtype} / SDPA={sdpa_ok}"
        )

        # ==== 完了ログ ====

        logger.info(json.dumps({
            "event": "request_done",
            "req_id": req_id,
            "out": os.path.relpath(out_path),
            "frames": written,
            "elapsed_sec": elapsed,
            "gpu_after": gpu_mem_info(),
        }, ensure_ascii=False))

        return out_path

    except Exception as e:
        elapsed = round(time.time() - t0, 3)

        # ==== 失敗ログ ====

        logger.error(json.dumps({
            "event": "request_failed",
            "req_id": req_id,
            "error": repr(e),
            "trace": traceback.format_exc(),
            "elapsed_sec": elapsed,
            "gpu_after": gpu_mem_info(),
        }, ensure_ascii=False))

        raise  # エラーは Gradio 側にも伝搬

# ---- Gradio UI -------------------------------------------------------------

with gr.Blocks(title="Wan2.2 T2V-A14B (Diffusers) WebUI") as demo:
    gr.Markdown("### Wan2.2 T2V‑A14B — テキストから動画生成")
    with gr.Row():
        prompt = gr.Textbox(
            label="Prompt",
            value="cyberpunk rainy neon city street at night, cinematic, moody lighting, 4k",
            lines=3,
        )

    with gr.Row():
        num_frames = gr.Slider(17, 2000, value=97, step=1, label="num_frames(長尺可)")
        fps = gr.Slider(8, 30, value=24, step=1, label="fps")
        dtype = gr.Radio(choices=["bf16", "fp16"], value="bf16", label="compute dtype(H100:bf16推奨)")

    with gr.Row():
        guidance_scale = gr.Slider(1.0, 12.0, value=6.5, step=0.5, label="guidance_scale(CFG)")
        steps = gr.Slider(10, 80, value=50, step=1, label="num_inference_steps")
        seed = gr.Number(value=None, label="seed(未指定=ランダム)")

    btn = gr.Button("Generate", variant="primary")
    video = gr.Video(label="Result", autoplay=True)

    # 直列実行(GPU 共有のため)

    btn.click(
        fn=generate,
        inputs=[prompt, num_frames, fps, dtype, seed, guidance_scale, steps],
        outputs=,
        concurrency_limit=1
    )

demo.queue().launch(server_name="0.0.0.0", server_port=7860, share=False)
run.pyでの動作確認
次に、run.pyに以下の引数を渡して実行できるかを確認します。
- 利用モデル:Wan2.2-T2V-A14B-Diffusers
- プロンプト:cyberpunk city with neon lights, rainy night, cinematic
- 出力先:/models/output.mp4
- フレーム数:48 frames(デフォルトのfpsが24であるため約2秒のファイルが作成される)
run.pyを試験実行
(text2video) ubuntu@text-to-video-test:/models/Wan2.2$ python /models/Wan2.2/run.py --model_path /models/Wan2.2/Wan2.2-T2V-A14B-Diffusers --prompt "cyberpunk city with neon lights, rainy night, cinematic" --output /models/output.mp4 --num_frames 49

Loading pipeline components...: 0%| | 0/6 [00:00<?, ?it/s]

Loading checkpoint shards: 17%|███████████▊ | 2/12 [00:00<00:00

(中略)

100%|█████████████████████████████████████████████████████████████████████████████████████████████████| 50/50 [10:39<00:00, 12.80s/it]

Saved: /models/out.mp4
上記実行には時間がかかるため、TeraTermで別ウィンドウを開き、nvidia-smiコマンドの継続実行でGPUの負荷状況を観測します。
使用している電力(Pwr:Usage/Cap)およびVRAM(Memory-Usage)、実行プロセス(Processes)などが1秒単位で変化し、変化した部分がハイライトで更新されることを確認します。
nvidia-smiコマンドを1秒間隔で実行、変更部分ハイライト表示、ヘッダー省略
ubuntu@text-to-video-test:~$ watch -n 1 -d -t nvidia-smi #終了時はCtrl+C押下

Tue Feb 3 11:21:17 2026

+-----------------------------------------------------------------------------------------+

| NVIDIA-SMI 590.48.01 Driver Version: 590.48.01 CUDA Version: 13.1 |

+-----------------------------------------+------------------------+----------------------+

| GPU Name Persistence-M | Bus-Id Disp.A | Volatile Uncorr. ECC |

| Fan Temp Perf Pwr:Usage/Cap | Memory-Usage | GPU-Util Compute M. |

| | | MIG M. |

|=========================================+========================+======================|

| 0 NVIDIA H100 80GB HBM3 Off | 00000000:00:04.0 Off | 0 |

| N/A 58C P0 675W / 700W | 77383MiB / 81559MiB | 100% Default |

| | | Disabled |

+-----------------------------------------+------------------------+----------------------+

+-----------------------------------------------------------------------------------------+

| Processes: |

| GPU GI CI PID Type Process name GPU Memory |

| ID ID Usage |

|=========================================================================================|

| 0 N/A N/A 179966 C python 77374MiB |

+-----------------------------------------------------------------------------------------+
なお、出力された動画(/models/output.mp4)を確認したい場合は、各自のローカル環境にscpコマンドなどを利用して転送します。
TeraTermの ファイル > SSH SCP… からFromとToを指定して「受信」をクリックすると、該当のファイルをローカルのPCにダウンロードできます。
ファイルをダウンロードできたら、24fps x 約2秒の動画になっていることを確認します。
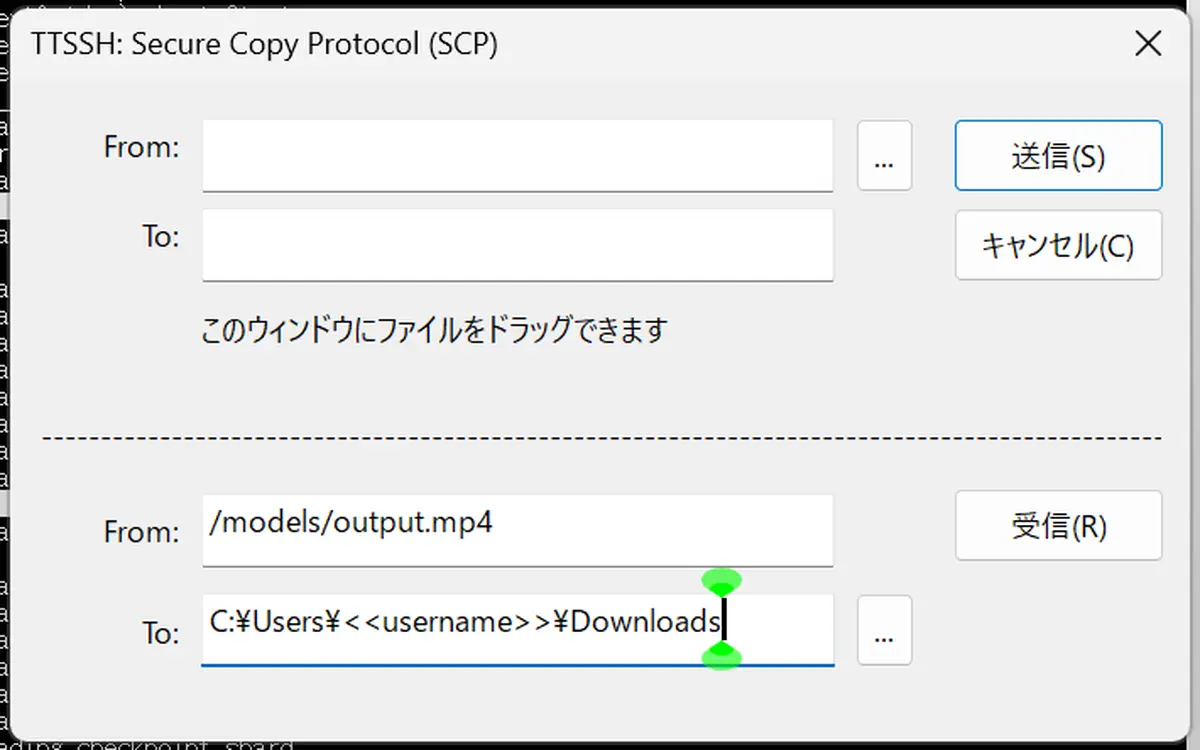
- From : /models/output.mp4
- To : C:\Users\\Downloads # userは自身のPCのログインユーザー名
WebUIの実行
run.pyでコマンドベースでの動画生成に成功しましたが、都度コマンドを実行してターミナルソフトでダウンロードするのは煩雑です。
そこで、より直感的に検証できるよう、WebUIでの実行環境を用意します。
動作要件は以下となります。
- 設定可能なパラメーター:prompt / num_frames / fps / dtype / seed(任意)
- フレーム数を UI 側で自動補正する
- 生成中はキュー&進捗表示する(queue=True)
- Out of Memoryエラー(OOMエラー、VRAM不足による生成処理実行の停止)の発生を避けるため以下の処理を実装する
- 長尺になる場合、一定フレーム数ごとに生成を実行する
- 段階的にCPUに負荷をオフロードする
Gradioの起動(app.pyの実行)
(text2video) ubuntu@text-to-video-test:/models/Wan2.2$ python /models/Wan2.2/app.py

Loading pipeline components...:   0%|                                                                           | 0/6 [00:00<?, ?it/s]

(中略)

Loading pipeline components...: 100%|████████████████████████████████████████████████ ███████████████████| 6/6 [00:04<00:00,  1.39it/s]

* Running on local URL:  http://0.0.0.0:7860

* To create a public link, set `share=True` in `launch()`.
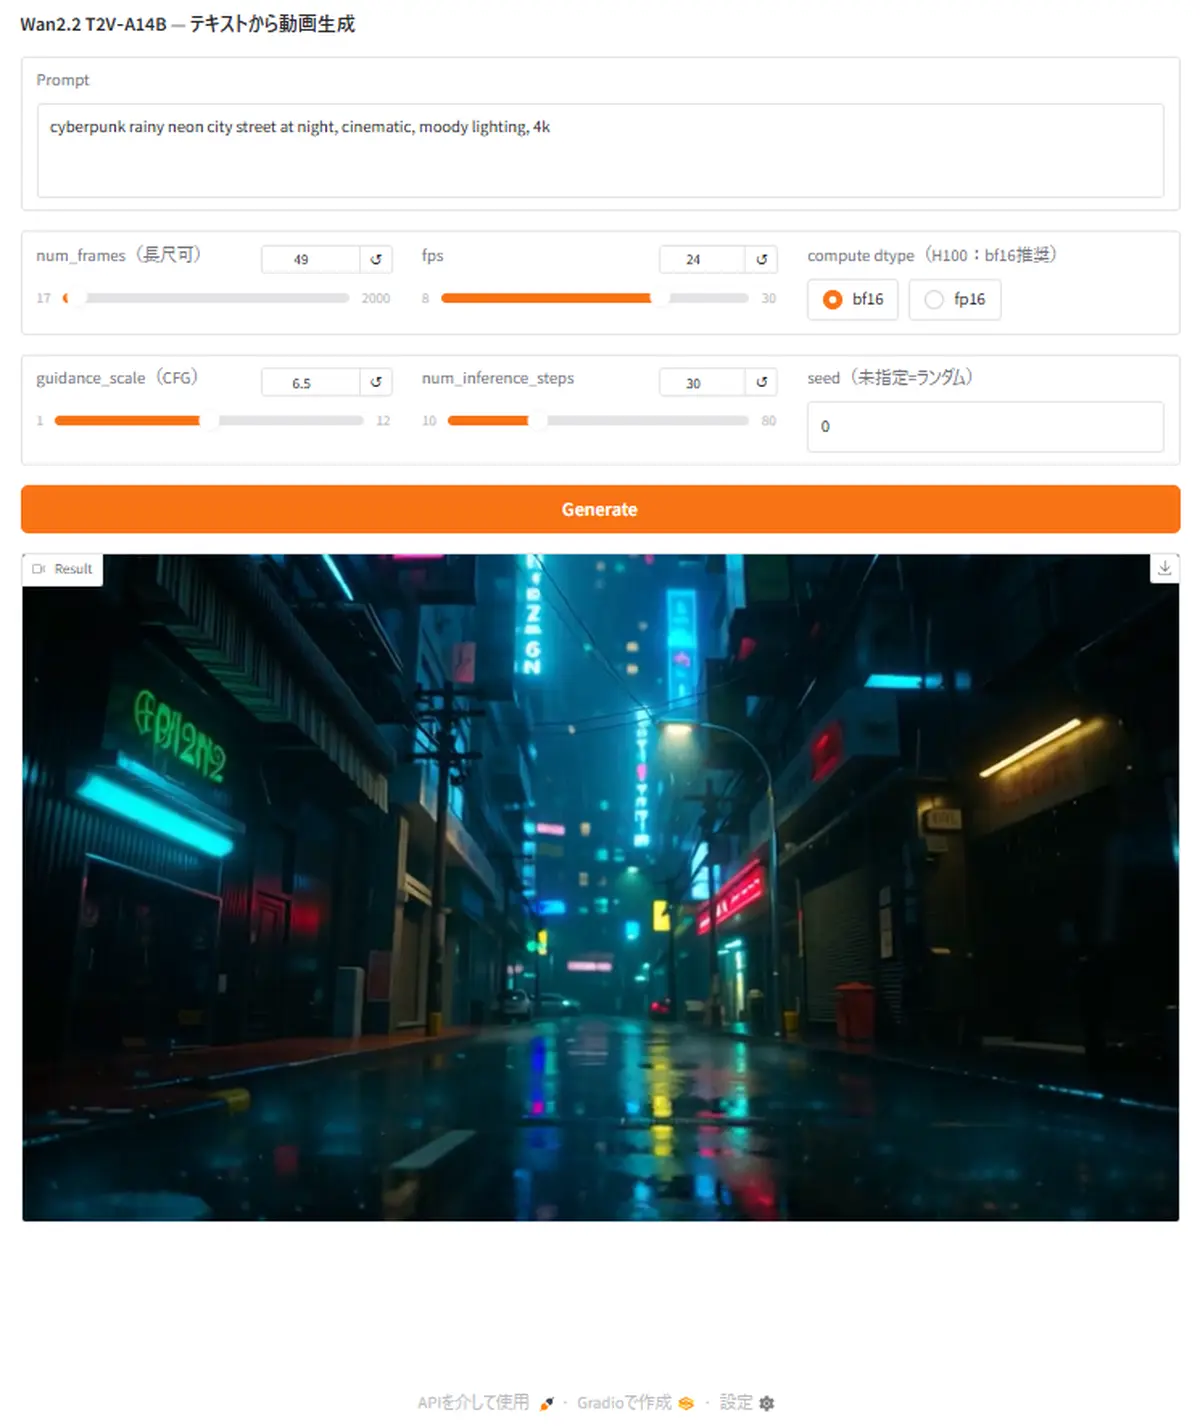
上記状態になったらWebブラウザからhttp://<<サーバーのIPアドレス>>:7860 にアクセスすると下記画面が表示されます。
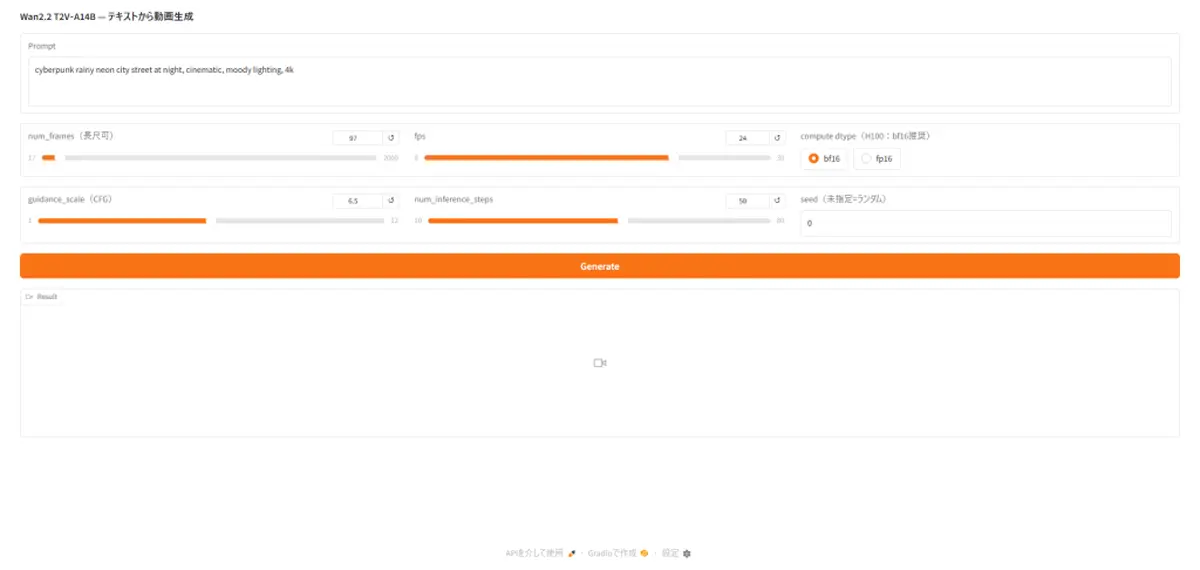
必要なパラメーターを入力してGenerateボタンを押下すると、動画生成が開始されます。また、ターミナルソフト側でも試験実行と同様に、生成状況の詳細な進捗が出力されます。
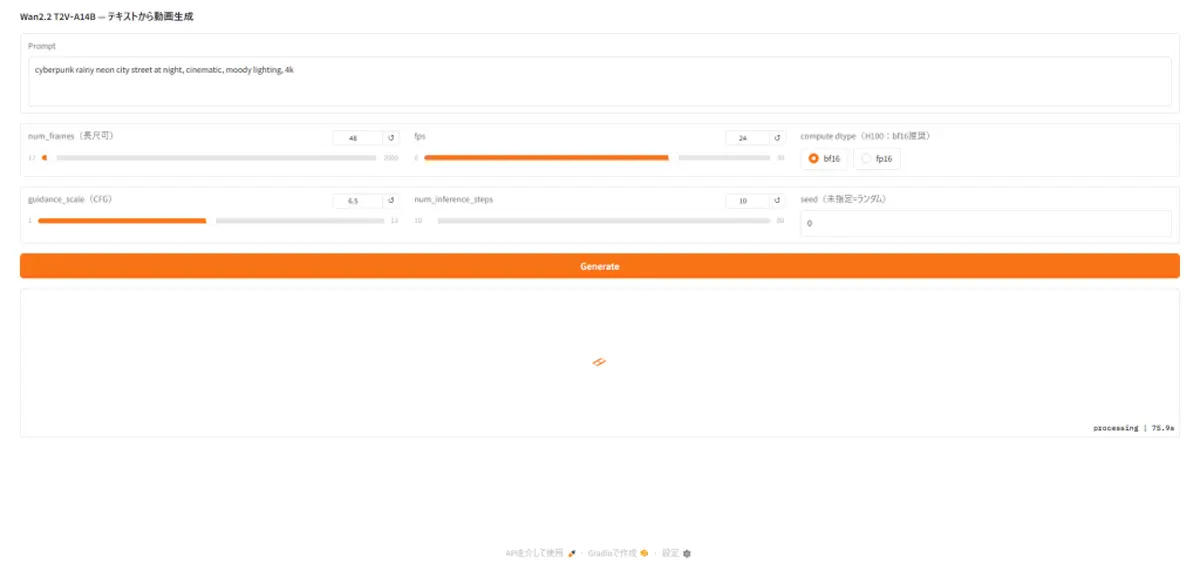
動画生成中の出力(python /models/Wan2.2/app.pyの実行ウィンドウ)
* Running on local URL:  http://0.0.0.0:7860

* To create a public link, set `share=True` in `launch()`.

2026-02-16 14:53:38 INFO [wan2v.app] {"event": "request_received", "req_id": "305250f2-b936-42a6-8b82-dbaaeb69d7b5", "prompt": "cyberpunk rainy neon city street at night, cinematic, moody lighting, 4k", "num_frames": 48, "fps": 24, "dtype": "bf16", "seed": 0, "guidance_scale": 6.5, "steps": 10, "sdpa": false, "gpu": {"free_mib": 80552, "used_mib": 529, "total_mib": 81081}}

 10%|████████                                                                         | 1/10 [00:13<02:03, 13 20%|████████████████▏                                                                | 2/10 [00:27<01:49, 13.68s/it]
生成が完了すると、以下のように生成された動画を参照およびダウンロードが可能になります。
まとめ
概ねここまでの内容を、高火力 VRTであれば1〜2時間、金額に換算すると約1000円~2000円ほどで検証できました。
このように、高火力 VRTならGPUを大きく使用する環境を素早く手配して使い始めることができ、そして不要になればすぐにやめることもできます。
将来的な機材購入の検討、一時的な利用者へのリソース割当、サービスのバックエンドとしてのスケール可能な環境など、さまざまな用途で活用いただければと思います。